How to Make Adhesive Sticky Again: Revival Tips
Restoring Sticker Stickiness
Restoring the stickiness of a sticker involves multiple approaches including cleaning the surface and using heat to reactivate the adhesive. These methods can help ensure that stickers adhere properly to their intended surfaces.
Cleaning and Preparing the Surface
One of the crucial steps in making a sticker sticky again is cleaning and preparing the surface where the sticker will be applied. A clean surface allows the adhesive to bond more effectively.
- Use Isopropyl Alcohol: It’s recommended to clean the surface with isopropyl alcohol. This removes any dirt, oil, or residue that may hinder the sticker’s adhesive properties.
- Avoid Touching the Adhesive: When handling the sticker, avoid touching the adhesive side as this can transfer oils and reduce its stickiness.
- Slip Solution for Positioning: For large stickers, use a slip solution, which is a mix of water and a drop of dishwashing soap. This allows the sticker to be positioned correctly and helps slide it into place before it fully adheres (Quora).
Using Heat to Activate Adhesive
Heating the sticker can help reactivate the adhesive, making it more effective in sticking to surfaces.
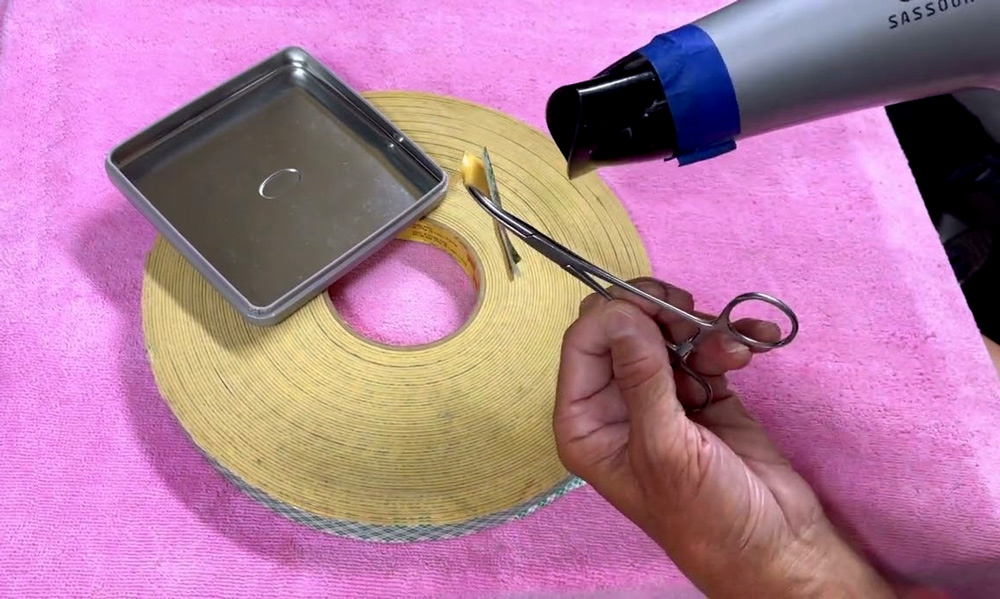
- Hair Dryer or Heat Gun: One method to reactivate the adhesive is by using a hair dryer or a heat gun. Gradually heat the sticker until it becomes malleable.
- Apply Firm Pressure: Once the adhesive is heated, apply firm pressure to reattach the sticker to the surface.
- Temperature Guidelines: Keep the temperature under 100°C to avoid damaging the sticker. (Quora)
| Method | Tool | Temperature |
|---|---|---|
| Hair Dryer/Heat Gun | Hair Dryer, Heat Gun | <100°C |
| Slip Solution | Water & Soap | Room Temperature |
By ensuring the sticker and the surface are properly prepared, and using the right amount of heat, you can increase the adhesive’s effectiveness. For further reading on adhesive products and their comparisons, check out our other articles like how to make a sticker sticky again, 3m headliner adhesive vs. super 77 and ca glue vs. epoxy.
Methods for Sticker Restoration
When it comes to reviving the adhesiveness of stickers, several techniques can be employed to ensure they stick effectively. Here are some methods that can help you make adhesive sticky again.
Slip Solution Technique
The Slip Solution Technique involves using a mixture of water and a drop of dishwashing soap. This method is particularly useful for large stickers that need precise positioning.
- Clean the Surface: Before applying the sticker, clean the surface with isopropyl alcohol to remove dust, dirt, and oil, which can hinder the adhesive’s effectiveness (Quora).
- Prepare the Solution: Mix water with a drop of dishwashing soap to create a slip solution.
- Apply the Solution: Lightly spray or apply the slip solution onto the surface where the sticker will be placed.
- Position the Sticker: Place the sticker onto the surface, using the slip solution to slide it into the correct position.
- Remove Excess Solution: Gently press out any excess solution from underneath the sticker.
Exposing to Sunlight Treatment
Exposing stickers to sunlight can help reactivate the adhesive, making them stick better.
- Clean and Prepare: Clean the surface and the back of the sticker with isopropyl alcohol.
- Place in Sunlight: If the object with the sticker can be moved, place it in direct sunlight. The heat from the sun will warm the adhesive.
- Reapply Pressure: Once the adhesive becomes malleable, press the sticker firmly onto the surface to resecure it.
This method can be particularly effective when combined with other techniques, such as using a heat gun or hair dryer for more controlled heating.
Adhesive Spray Application
Using an adhesive spray is another reliable method to restore sticker stickiness.
- Clean the Sticker and Surface: Ensure both the sticker and the surface are free from dirt and oil.
- Apply Adhesive Spray: Evenly coat the back of the sticker with the adhesive spray (Mr. Print Specialist).
- Allow to Set: Let the adhesive spray set for a minute or two.
- Reapply the Sticker: Carefully place the sticker back into position and press firmly.
| Method | Effectiveness | Materials Needed |
|---|---|---|
| Slip Solution Technique | High | Water, dishwashing soap, isopropyl alcohol |
| Exposing to Sunlight | Medium | Isopropyl alcohol |
| Adhesive Spray Application | High | Adhesive spray, isopropyl alcohol |
Using these methods, you can effectively bring back the stickiness of your stickers and ensure they remain securely in place. For more information on adhesive solutions, check out our articles on how to make a sticker sticky again and how to measure stickiness of adhesive.
Renewing Adhesiveness of Stickers
Sometimes, the adhesive on stickers can lose its stickiness over time. Understanding how to make adhesive sticky again can help prolong the life and usability of your stickers. Here are some effective methods.
Rubber Cement Application
Applying rubber cement is one of the reliable methods to restore the adhesive quality of stickers. This technique involves:
- Applying a Thin Layer: Use a brush to apply a thin layer of rubber cement to the back of the sticker.
- Allowing it to Dry: Allow the rubber cement to dry until it becomes tacky.
- Pressing the Sticker: Gently press the sticker back onto the surface.
Rubber cement creates a durable bond and can revive the adhesive properties effectively.
Choosing the Best Method
There are several ways to rejuvenate sticker adhesiveness, each with its own advantages. Here is a quick comparison:
| Method | Effectiveness | Time Required | Best For |
|---|---|---|---|
| Rubber Cement Application | High | Moderate | Long-term adhesion |
| Heat Activation | Medium | Quick | Temporary fixes |
| Adhesive Spray | High | Quick | Even application |
Heat Activation involves using a hair dryer or heat gun to gently heat the sticker’s surface. This makes the adhesive pliable and helps it stick again.
Adhesive Spray works by evenly coating the back of the sticker. After allowing the spray to set for a minute, press the sticker back onto its surface (Mr. Print Specialist).
Explore our detailed guide on how to make a sticker sticky again to find out which method suits your needs best.
Caution and Product Care
When attempting to restore stickiness:
- Test First: Always test the method on a small, inconspicuous area to ensure it won’t damage the sticker’s design.
- Avoid Overheating: When using heat, avoid overheating as it can warp or damage the sticker.
- Proper Storage: Store stickers in a cool, dry place to maintain their adhesive quality.
For more guidance on adhesive products, check out our articles on how to measure stickiness of adhesive and best adhesive for asphalt shingles. Following these practices will ensure that your stickers remain functional and attractive.
Adhesive Bra Stickiness Tips
Maintaining the stickiness of your adhesive bra is essential for ensuring its longevity and continued effectiveness. Here are some tips to help revive the stickiness of your adhesive bra.
Washing for Restoration
One of the simplest and most effective ways to make adhesive sticky again is by washing your adhesive bra with soap and water. This method helps remove any buildup on the adhesive and restore its stickiness (Niidor).
Steps:
- Rinse the bra under lukewarm water.
- Apply a small amount of mild soap to your fingers.
- Gently rub the adhesive side in circular motions.
- Rinse thoroughly to remove all soap residue.
- Allow the bra to air dry with the adhesive side up.
This method is effective in removing oils and other residues that may have compromised the adhesive properties of your bra.
Quick Fix with Double-Sided Tape
For a temporary solution, using double-sided tape can be an excellent choice. It provides a quick fix to restoring stickiness and can be a lifesaver for special occasions.
| Adhesive Type | Duration of Fix |
|---|---|
| Double-sided Tape | Temporary (1 day) |
| Silicone Adhesive Gel | Long-term (5-10 uses) |
Steps:
- Cut small strips of double-sided tape.
- Place the tape on the areas of the adhesive bra that have lost their stickiness.
- Press firmly to ensure the tape adheres well to the bra.
While this quick fix is handy, it is not a long-term solution and should only be used when necessary.
Silicone Adhesive Gel Solution
Silicone adhesive gel provides a more permanent solution for renewing adhesive properties. This method involves applying a new layer of silicone adhesive gel to restore and maintain long-lasting stickiness (Niidor).
Steps:
- Purchase a silicone adhesive gel designed for bras.
- Clean the adhesive bra as described in the washing method.
- Apply a thin, even layer of the silicone adhesive gel to the bra.
- Allow the gel to dry completely according to the manufacturer’s instructions.
- Test the stickiness before wearing.
By following these tips, you can extend the lifespan of your adhesive bra and ensure it remains a reliable part of your wardrobe. For more information on adhesive solutions, check our comparisons such as 3m spray adhesive 90 vs. 77 and 3m headliner adhesive vs. super 77.
Maximizing Sticky Bra Lifespan
To get the most out of your adhesive bra and keep it functioning optimally, it’s crucial to understand how to maximize its lifespan. Here are key considerations to help you maintain its stickiness and prolong its usability.
Frequency of Use Considerations
The lifespan of a sticky bra can vary significantly, ranging between 50 and 100 uses. Factors that influence this include the brand, material, and adhesive quality (Niidor). To maximize the longevity of the adhesive, it’s advisable to reserve adhesive bras for special occasions rather than for daily wear.
| Factor | Lifespan Impact |
|---|---|
| Brand | High |
| Material | Medium |
| Adhesive Quality | High |
| Frequency of Use | High |
Proper Care Instructions
Ensuring proper care of your sticky bra is essential in maintaining its adhesive properties. Here are some care instructions:
- Regular Cleaning: After every use, clean the adhesive side with mild soap and water. This helps remove oils and dirt that can reduce stickiness.
- Air Drying: Let the bra air dry with the adhesive side up. Avoid using a towel or cloth to dry it, as fibers can stick to the adhesive.
- Careful Handling: Be gentle when handling the bra, whether putting it on or removing it, to prevent damaging the adhesive.
For additional tips on care, visit our article on proper care instructions.
Maintaining Stickiness for Longevity
Maintaining the stickiness of your adhesive bra involves ongoing care and appropriate product use:
- Silicone Adhesive Gel Solution: Use silicone adhesive gel as an effective solution for restoring stickiness to your adhesive bra, providing long-lasting results (Niidor).
- Storage Practices: Store the bra in its original packaging or a clean, dry place to avoid dust and debris from accumulating on the adhesive side.
- Avoid Moisture and Heat: Keep the adhesive bra away from excessive moisture and heat as these can degrade the adhesive faster.
By following these guidelines, you can help ensure that your sticky bra remains effective and serviceable for as long as possible.
For comparing adhesive solutions and further product recommendations, you might find our articles on ca glue vs. epoxy and solvent vs. solvent free adhesive useful.
Factors Affecting Tape Stickiness
Understanding the factors that affect tape stickiness can significantly improve the effectiveness of your adhesive applications. Below we explore different aspects such as climate impact, tape selection, and recycled content.
Climate Impact on Adhesive
Temperature plays a crucial role in the effectiveness of adhesive tapes. Adhesive performance can degrade in extreme temperatures. For instance, using standard packaging tape in cold environments can cause the adhesive to freeze, thereby limiting its stickiness (Crawford Packaging). Conversely, high temperatures can melt the adhesive, reducing its ability to maintain a firm bond.
| Temperature | Impact on Adhesive |
|---|---|
| Below 32°F (0°C) | Adhesive may freeze |
| Above 90°F (32°C) | Adhesive may melt |
Tape Selection for Usage
Choosing the appropriate type of tape for specific applications is essential. Factors such as the thickness, width, and specific adhesive properties of the tape can affect its performance. Using tape that is too thin or too wide for the intended application can lead to inadequate sealing and sticking issues (Crawford Packaging).
Different tapes are designed for specific uses:
- Packaging Tape: Usually thicker and more durable
- Masking Tape: Thin and designed for easy removal
- Double-Sided Tape: Used for mounting and bonding two surfaces
For detailed comparisons on various tapes, check out our guides on gorilla spray adhesive vs. 3m 77 and 3m 90 vs. gorilla spray adhesive.
Recycled Content Influence
The adhesive bond can also be affected by the amount of recycled content in packaging materials. Recycled content fibers in cardboard and paperboard are shorter and less uniform, which can limit the adhesive’s ability to form a strong bond.
| Material | Recycled Content | Impact on Adhesive |
|---|---|---|
| Corrugated Cardboard | High | Reduced stickiness |
| Paperboard | Moderate | Variable stickiness |
| Virgin Cardboard | Low | Optimal stickiness |
For more insights on adhesive effectiveness and different materials, visit our articles on metal glue vs. welding and glue all vs. school glue.
By understanding these factors, one can better address issues related to tape stickiness and make informed decisions on adhesive selections. For additional tips and solutions, read our guide on how to make a sticker sticky again.
