How To Use Contact Cement Properly: Step by Step
Understanding Contact Cement
Contact cement is a versatile adhesive used in various applications due to its strong bonding capabilities. It’s essential to understand its proper application methods and drying time factors to use it effectively.
Application Methods
Contact cement can be applied using various methods, each suited for different types of projects and surface areas. The appropriate method ensures a uniform coat and optimal bonding. Here are some of the common application methods:
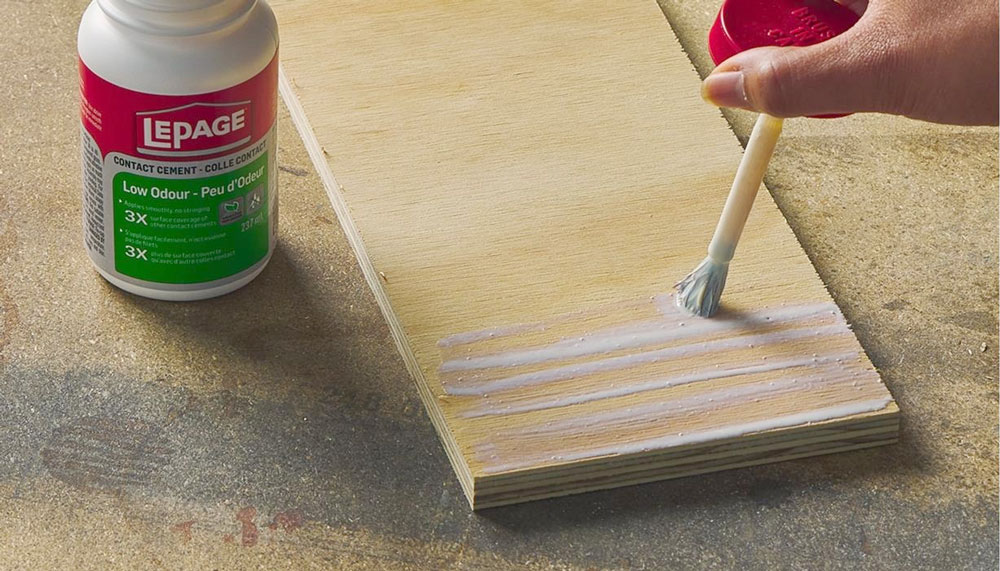
- Brush: Ideal for small surfaces or detailed work. It allows precise application but may not be even.
- Roller Coater: Useful for large, flat surfaces. It ensures an even, consistent layer of adhesive.
- Notched Trowel: Suitable for textured or irregular surfaces. It allows for a thick and even application.
- Air Spray (Hot or Cold): Best for extensive areas, providing a smooth and fine layer of adhesive.
- Airless Spray (Hot or Cold): Similar to air spray but offers more control over the adhesive flow.
- Curtain Coater: Efficient for large-scale industrial applications, delivering a consistent and controlled layer.
| Method | Best For |
|---|---|
| Brush | Small surfaces, detailed work |
| Roller Coater | Large, flat surfaces |
| Notched Trowel | Textured, irregular surfaces |
| Air Spray | Extensive areas |
| Airless Spray | Precise control |
| Curtain Coater | Industrial applications |
For detailed information on how these methods compare to other adhesives, refer to our article on how does contact adhesive work.
Drying Time Factors
The drying time of contact cement can significantly influence the strength and durability of the bond. Several factors affect the drying time:
- Temperature: Higher temperatures accelerate drying, while lower temperatures slow it down.
- Humidity: High humidity can prolong drying time due to increased moisture in the air.
- Thickness of Application: Thicker layers take longer to dry compared to thin, even coats.
- Air Circulation: Good ventilation speeds up the drying process by aiding in solvent evaporation.
| Factor | Impact on Drying Time |
|---|---|
| Temperature | Higher = Faster; Lower = Slower |
| Humidity | Higher = Slower |
| Thickness of Application | Thicker = Slower |
| Air Circulation | Better = Faster |
An optimal balance of these factors ensures a proper bond. Make sure to apply a sufficient layer of adhesive and allow adequate drying time for the best results.
For more insights on different types of adhesives and their applications, check our comparison articles such as construction adhesive vs. caulk and e6000 vs jb weld.
Surface Preparation for Contact Cement
Proper surface preparation is crucial when working with contact cement. It ensures a strong bond and reduces the risk of bond failure. Effective surface preparation involves cleaning the surfaces to be bonded and abrading them as necessary.
Cleaning Procedures
Surface cleanliness is key for achieving a strong and lasting bond with contact cement. Any oils, dust, or contaminants must be removed thoroughly:
-
Degreasing: Heavy oils on surfaces may require using a degreaser or solvent-based cleaner such as 3M™ Prep Solvent 70, 3M™ Citrus Base Cleaner, mineral spirits, or naphtha to ensure complete removal of oil.
-
Cleaning: After degreasing, follow up with an IPA/water mixture (isopropyl alcohol and water) to remove any remaining residues. This ensures that the surface is free from contaminants and ready for bonding.
-
Special Cases: For substrates with low surface energy or those coated with adhesion-impeding chemicals, applying a primer can significantly enhance both immediate and long-term bonding.
It’s essential to ensure that the surfaces are completely dry before applying contact cement.
Abrading Surfaces
In some cases, especially with painted surfaces or plastics, abrading (sanding) the surface can further enhance adhesion by increasing the surface area:
-
Sanding: Abrading the surface with fine abrasive materials (e.g., fine-grit sandpaper) can create shallow scratches and roughen up the surface, increasing the effective surface area by up to 40% (Can-Do National Tape). This allows the contact cement to adhere more effectively.
-
Cleaning Post-Abrading: After sanding, clean the surface again to remove dust and particles created by the abrasion process. This step ensures that nothing interferes with the adhesive bond.
-
Manufacturer Guidelines: Always check with the manufacturer before abrading, especially when dealing with high-bond tapes or specific substrates that may require a smooth finish for optimal adhesion.
Properly preparing surfaces through cleaning and abrading ensures a strong and durable bond when using contact cement. For more information on how to use various adhesives and their applications, you can explore our articles on how to use contact adhesive properly and how does contact adhesive work.
Factors Influencing Bond Failure
Understanding the factors that influence bond failure when using contact cement is essential for achieving strong, durable bonds.
Common Causes
Bond failure in contact cement can occur due to several reasons as identified by multiple sources including Cattie Adhesives and CP Adhesives:
- Coating Too Thin: Applying a thin coating of contact cement can result in weak bonds since the adhesive layer is inadequate for effective bonding.
- Bonding Too Soon: If bonding is attempted before the solvent in the cement has evaporated, the adhesive may not set properly, leading to bond failure.
- Insufficient Pressure: Not applying enough pressure during the bonding process can prevent the adhesive from forming a strong bond.
- Exposure to High Heat: Contact cement bonds can fail if the bonded object is exposed to high temperatures within the first 3 days of application.
| Cause of Bond Failure | Description |
|---|---|
| Coating Too Thin | Insufficient adhesive coverage |
| Bonding Too Soon | Premature bonding before solvent evaporation |
| Insufficient Pressure | Lack of adequate pressure during bonding |
| Exposure to High Heat | High temperatures within initial 3 days |
Prevention Techniques
To prevent bond failure, several techniques can be employed to ensure a successful and long-lasting bond (Can-Do National Tape).
- Ensure Proper Coating Thickness: Apply an adequate, even layer of contact cement to both surfaces. Multiple thin coats can be applied if necessary to achieve the required thickness.
- Wait for Complete Solvent Evaporation: Before bonding, allow the contact cement to dry until a finger pressed against it can be lifted away cleanly with no “legginess”, indicating the solvent has completely evaporated (Shoegazing).
- Apply Sufficient Pressure: Use an appropriate amount of pressure over the entire surface area to ensure a tight, uniform bond. This can be achieved using a roller or clamps.
- Control Environmental Conditions: Avoid exposing the bonded area to extreme temperatures or high humidity during the initial curing period.
By understanding and mitigating these common causes of bond failure, one can ensure the effectiveness of contact cement in various applications. For more in-depth insights on contact cement and other adhesive solutions, visit our articles on how does contact cement work and how to use contact adhesive properly.
Bonding Techniques with Contact Cement
Ensuring a strong bond when using contact cement involves mastering key techniques: proper coating thickness and effective pressure application. Both are crucial steps in understanding how to use contact cement properly.
Proper Coating Thickness
The viscosity of contact adhesive, which indicates the thickness, plays a significant role in its application. For many substrates, contact cement can be applied using various techniques such as brush, roller coater, notched trowel, air spray, and others. Depending on the chosen method, the appropriate thickness needs attention for an effective bond.
| Application Method | Typical Thickness |
|---|---|
| Brush | Medium to High |
| Roller Coater | Medium |
| Notched Trowel | Medium to High |
| Air Spray (Hot/Cold) | Low |
| Airless Spray (Hot/Cold) | Low |
| Curtain Coater | Medium |
The applied coating should cover the substrate evenly but not excessively thick. Typically, a uniform layer ensuring full surface coverage without pooling is ideal. Allow the adhesive to dry to a tacky state before bonding the surfaces together. This stage might vary slightly depending on the environmental conditions and the specific adhesive brand.
Applying Pressure Effectively
Once the coating has been applied and allowed to dry to a tacky state, the next step involves applying pressure. This step is crucial to achieving a strong, permanent bond with contact cement, which provides an instant bond upon contact.
For optimal results, place the surfaces together carefully and apply firm, even pressure. A roller is often used for this purpose to ensure enough force is exerted across the entire surface. This step is necessary for activating the adhesive’s bonding properties and ensuring a uniform, durable connection.
Seconds count when pressure is applied as improper pressure could lead to bond failure. For large surfaces like countertops, using a weighted roller can ensure consistent pressure distribution, minimizing the chance of weak spots.
| Pressure Application Tools | Recommended Use |
|---|---|
| Hand Roller | Small to Medium Surfaces |
| Weighted Roller | Large Surfaces |
| Manual Pressure | Small Areas or Delicate Surfaces |
By maintaining the right balance between coating thickness and pressure application, users can maximize the effectiveness of contact cement, ensuring robust and reliable bonds on various substrates. For more information on avoiding common mistakes, refer to our article on the factors influencing bond failure.
Understanding and implementing these techniques will help users get the most out of their contact cement, making even challenging projects more achievable. For further details on adhesive properties and types, consider our comparisons such as e6000 vs. super glue or barge cement vs rubber cement.
Safety Measures for Working with Contact Cement
When working with contact cement, it’s essential to understand the various hazards and ensure proper safety measures are in place to protect yourself and others. This section will cover hazard identification and the necessary protective gear for safe use.
Hazard Identification
Contact cement poses several hazards that one should be aware of when using it. These include:
-
Skin Irritation and Burns: Cement can cause significant skin problems, ranging from irritation to severe burns. Exposure to wet contact cement can result in first, second, or third-degree burns, sometimes requiring prolonged healing or hospitalization (ELCOSH).
-
Eye Injuries: Cement dust can easily become airborne, causing eye irritation or even potentially more severe injuries like burns and blindness, depending on the exposure level (ELCOSH).
-
Respiratory Issues: Inhaling cement dust can lead to respiratory problems, such as difficulty breathing, choking, and long-term conditions like silicosis, a fatal lung disease caused by high levels of silica dust (ELCOSH).
Protective Gear
To mitigate these hazards, proper protective gear must be worn when working with contact cement. Here are the recommended items:
-
Gloves: Waterproof rubber gloves protect hands from irritation and burns caused by direct contact with wet cement.
-
Eye Protection: Safety goggles or face shields prevent cement dust from entering the eyes, thus avoiding irritation and potential burns.
-
Respiratory Protection: Dust masks or respirators are crucial when working in environments where cement dust is likely to be airborne. This reduces the risk of inhaling harmful particles.
-
Protective Clothing: Long-sleeved shirts, pants, and waterproof boots minimize skin exposure to wet cement, preventing skin irritation and burns (ELCOSH).
| Protective Gear | Purpose |
|---|---|
| Gloves | Protect hands from irritation and burns |
| Safety Goggles | Shield eyes from dust and potential injuries |
| Respirators/Masks | Prevent inhalation of harmful dust particles |
| Protective Clothing | Minimize skin exposure and prevent irritation/burns |
Adhering to these safety measures is crucial for anyone learning how to use contact cement properly. It’s also essential to educate workers on these hazards and controls according to workplace safety standards like WHMIS (ELCOSH). For more detailed information on working safely with other adhesives, check out our articles on how to use construction adhesive without gun and how to use paper cement properly.
Alternatives to Contact Cement
While contact cement is known for its excellent bonding properties and ease of use, there are other strong adhesives that can be used for various applications. Here, we will explore some alternatives and their suitable uses.
Other Strong Adhesives
Several types of adhesives can effectively serve as alternatives to contact cement, each with its own strengths and ideal applications.
| Adhesive Type | Description | Strengths |
|---|---|---|
| Epoxy | A two-part adhesive consisting of a resin and a hardener. | Extremely strong bond, resistant to moisture and chemicals. |
| Rubber Solution | Made from synthetic raw rubber. | Durable and flexible, ideal for shoe repair (Shoegazing). |
| Super Glue (Cyanoacrylate) | Fast-drying, single-component adhesive. | Quick setting, strong bond on small areas. |
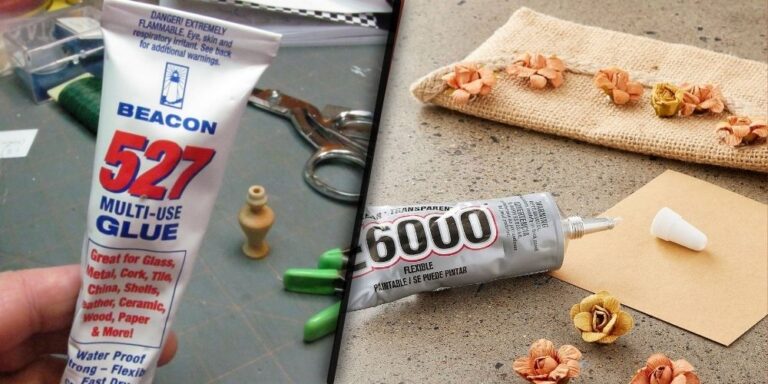
| E6000 | Industrial strength adhesive. | Versatile, waterproof, and temperature-resistant (B7000 vs. E6000). |
| Construction Adhesive | High-strength adhesive used in building projects. | Strong bond for heavy materials, such as tile and wood. |
Suitable Applications
Understanding the best environments for each type of adhesive helps ensure a successful bond and long-lasting results.
| Adhesive Type | Suitable Applications |
|---|---|
| Epoxy | Metal bonding, woodwork, repairs that require a very strong bond and resistance to harsh conditions. Check our comparison of e6000 vs. epoxy for more details. |
| Rubber Solution | Ideal for shoe soles, heels, and other footwear parts where flexibility and strong adherence are needed (Shoegazing). |
| Super Glue | Small crafts, quick repairs, and situations requiring an almost instant bond. |
| E6000 | Versatile uses including glass, metal, wood, ceramics, and more. Explore our comparisons of e6000 vs e6000 plus and e6000 vs b7000 to determine how this adhesive stacks up against others. |
| Construction Adhesive | Heavy-duty bonding for construction materials like tiles, stones, and large wooden structures. Learn how to use Gorilla construction adhesive for maximum effectiveness. |
Each alternative adhesive comes with its own set of benefits and potential use cases. When choosing an adhesive, it’s essential to consider the specific requirements of your project. For more detailed information on adhesive types and their specific applications, explore our comprehensive guides and comparisons:
