How to Stick LED Strip Lights on Wall: No Paint Damage
Choosing the Right LED Strip Lights
Factors to Consider
Selecting the appropriate LED strip lights for your space is crucial to ensure optimal performance and satisfaction. When choosing LED strip lights, consider the following factors:
-
Indoor or Outdoor Use: Determine whether the LED strip lights will be used indoors or outdoors. Outdoor LED strips should be waterproof and have a higher IP rating for protection against moisture and dust (LEDYi Lighting).
-
Brightness Levels: The brightness of LED strip lights is measured in lumens per meter. The appropriate brightness level depends on the room’s lighting needs. Higher lumens provide brighter light, suitable for task lighting, while lower lumens are preferable for accent lighting.
| Application | Lumens per Meter |
|---|---|
| Accent Lighting | 200-500 |
| Task Lighting | 700-1000 |
| General Lighting | 500-700 |
-
Color Temperature: Color temperature is measured in Kelvin (K) and impacts the ambiance of the space. Warmer tones (2700-3000K) create a cozy atmosphere, while cooler tones (4000-6000K) offer a more energetic and focused environment.
-
Power Supply: Ensure the power supply matches the voltage requirements of your LED strip lights. Incorrect power supply can lead to poor performance and safety issues.
-
Cutting and Connecting: Choose LED strips that allow cutting and easy reconnection to fit the specific dimensions and layout of your installation area.
Color Temperature Selection
Selecting the right color temperature is crucial for creating the desired ambiance and functionality in a space. Color temperature, measured in Kelvin (K), ranges from warm (yellowish) to cool (bluish) tones.
- Warm White (2700-3000K):
- Provides a cozy, inviting atmosphere
- Ideal for living rooms, bedrooms, and dining areas
- Neutral White (3500-4500K):
- Offers a balanced, natural white light
- Suitable for kitchens, bathrooms, and workspaces
- Cool White (5000-6500K):
- Delivers a bright, energetic feel
- Best for garages, basements, and commercial settings
Example of Color Temperature Impact
| Room Type | Recommended Color Temperature |
|---|---|
| Living Room | 2700-3000K |
| Kitchen | 3500-4500K |
| Office | 4000-5000K |
| Garage | 5000-6500K |
Using inappropriate color temperatures can negatively affect the overall look of a space. Matching color temperatures throughout a room enhances aesthetic appeal and functionality. This consideration is vital for achieving harmonious lighting design.
For more in-depth information on removing adhesive residue after installing LED strip lights, check out our guide on how to remove led strip lights adhesive.
Installation Methods for LED Strip Lights
When learning how to stick LED strip lights on wall without causing paint damage, exploring different installation methods can be crucial. Let’s delve into some of the most effective techniques.
Mounting Options
Various mounting options can be used for installing LED strip lights to ensure they stay securely in place without damaging the wall paint:
-
Double-Sided Tape: Extra strong double-sided tape is a common go-to for spaces where using other mounting options is limited. It offers a straightforward and clean installation process. However, it may not hold up well in high temperatures (LED Supply).
-
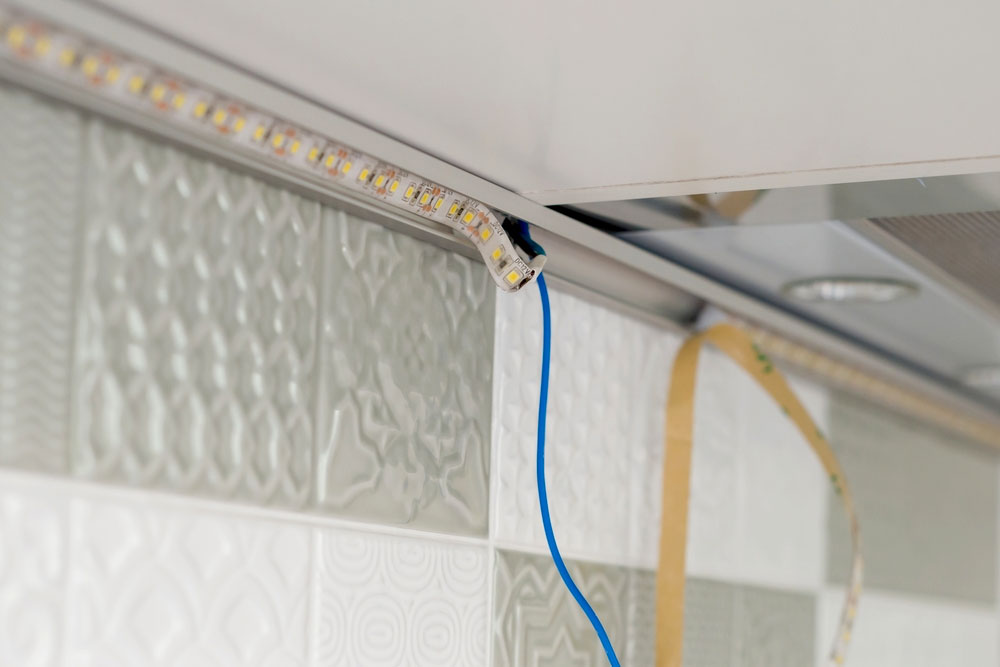
LED Strip Mounting Channels: For a more professional look, extruded aluminum channel profiles specifically designed for mounting LED strip lights are recommended. They help manage heat dissipation and provide a sleek, protected finish (Waveform Lighting).
-
Mechanical Fasteners: In homes with textured walls, adhesive alone might not suffice. Small hooks, loop style fasteners, screws, or even picture hangers can be utilized to achieve a secure attachment (Quora).
Using LED Strip Mounting Clips
LED strip mounting clips offer another effective mounting solution. These clips ensure secure attachment and are particularly useful in ensuring the longevity and performance of the LED setup:
| Mounting Clip Type | Description | Benefits |
|---|---|---|
| Plastic Clips | Simple clips that can hold the LED strip in place. | Easy to install, inexpensive. |
| Metal Clips | More durable than plastic, suitable for heavier strips. | Enhanced durability, better for high-temperature areas. |
| Adhesive Clips | Clips that come with an adhesive backing. | Easy to relocate, no need for screws. |
Mounting clips should be spaced evenly along the strip to distribute weight and stress. Proper mounting ensures the LED strips remain functional and aesthetic, as outlined by LEDYi Lighting.
For more details on ensuring a secure attachment of LED strips, see the article on how to remove led strip lights adhesive.
Common Issues with Adhesive
LED strips often come with adhesive backing, but environmental factors may affect their effectiveness:
- Temperature Fluctuations: Very hot climates can lead to adhesive failure. High temperatures can weaken the tape over time, causing strips to fall off (LED Supply).
Considering these elements ensures a damage-free, enduring installation. For those facing challenges with their choice of adhesive, comparing other options like b7000 vs super glue or e6000 vs epoxy may offer suitable alternatives.
Common Mistakes When Installing LED Strip Lights
Avoiding common mistakes when installing LED strip lights can ensure a long-lasting and effective lighting solution. Here are some frequent errors and how to avoid them.
Wrong LED Strip Light Selection
Selecting the wrong type of LED strip lighting is a common mistake that can lead to poor performance, reduced lifespan, and even safety hazards. Factors like indoor or outdoor use, brightness levels, and color temperature need to be considered (LEDYi Lighting)(HitLights). For instance:
- Indoor vs. Outdoor: Ensure the strip has adequate protection against moisture and dust if used outdoors.
- Brightness Levels: Choose LEDs with suitable lumens for the area you intend to light.
- Color Temperature: The mood setting varies with color temperature, so select warm white or cool white accordingly.
Incorrect Color Choice
Choosing the wrong color of LED strip lights can affect the ambiance and functionality of the space. Different tasks and areas require specific lighting hues:
- Warm White (2700-3000K): Ideal for bedrooms and living rooms for a cozy atmosphere.
- Neutral White (4000K): Works well in kitchens and workspaces.
- Cool White (5000-6000K): Suitable for task lighting in bathrooms and offices.
Choosing the wrong color temperature for the task can make the light either too harsh or insufficiently bright. For additional tips on selecting appropriate adhesives for your project, check out our article on how to use contact adhesive properly.
Insufficient Brightness
Insufficient brightness is another common issue. Under-illuminated spaces can make LED strip lights ineffective. Lumens, which measure light output, should be carefully considered (LEDYi Lighting):
| Application | Recommended Lumens per Foot |
|---|---|
| Accent Lighting | 200-400 |
| Under Cabinet | 300-600 |
| Task Lighting | 700-1000 |
Choosing strips with insufficient lumens can lead to dark spots and inadequate lighting for your needs. For detailed information about the brightness levels and other features of adhesives, read our comparison article on e6000 vs. epoxy.
Taking note of these common mistakes ensures better preparation and execution of LED strip light installations. For more details on removing adhesives, visit how to remove led strip lights adhesive.
Removing LED Strip Lights Adhesive
Taking down LED strip lights without damaging the wall can be a challenge. Here, we discuss two effective methods for removing adhesive: heat application and solvent-based removal techniques.
Heat Application Method
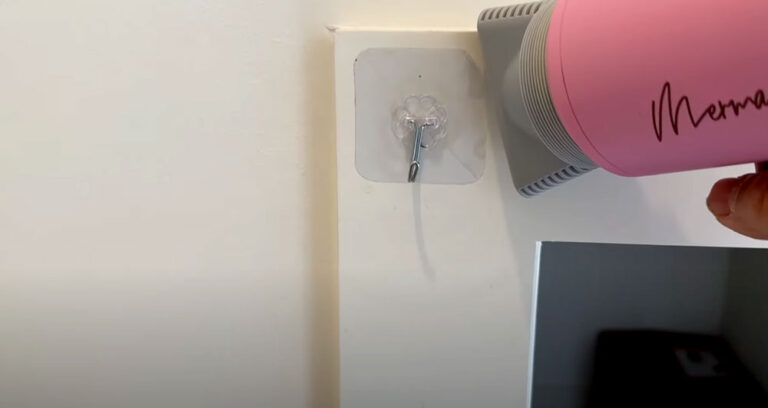
Using heat is a reliable method to soften the adhesive, making it easier to peel off the strips without damaging the wall. To do this, follow these steps:
- Tools Needed: Hair dryer or heat gun.
- Procedure:
- Turn on the hair dryer or heat gun to a moderate temperature setting.
- Hold it about 6 inches away from the LED strip and move it back and forth along the strip.
- Continue applying heat for about 1-2 minutes or until the adhesive feels soft to the touch.
- Gently peel off the LED strip starting from one corner, while still applying heat as you go.
Effective use of heat can ensure that the adhesive doesn’t leave residue, but if there is still some remaining, move on to using solvent-based removal techniques.
Solvent-Based Removal Techniques
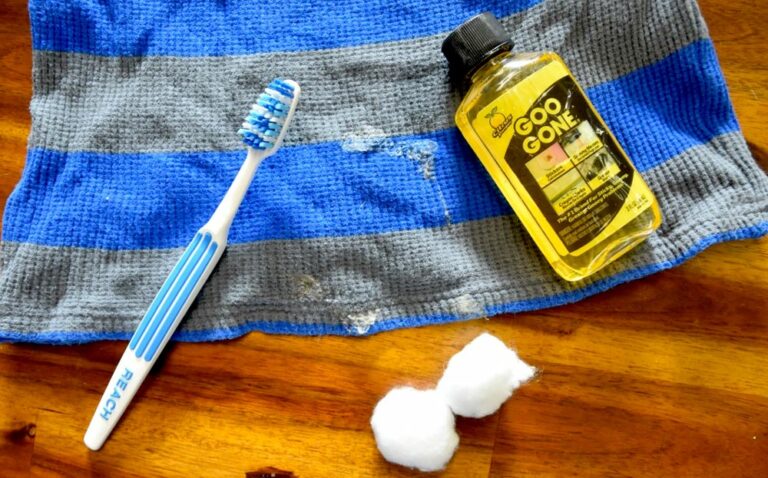
Solvent-based methods can be very effective in dealing with residual adhesive left after peeling off the LED strip. Here are steps and materials to use:
- Solvents Needed: Acetone, isopropyl alcohol, or lacquer thinner.
- Procedure:
- Apply a small amount of the chosen solvent onto a clean cloth or cotton ball.
- Gently rub the solvent onto the adhesive residue in a circular motion.
- Allow the solvent to sit for a few minutes to break down the adhesive.
- Wipe away the softened adhesive with a clean cloth.
| Solvent | Effectiveness | Safety Precautions |
|---|---|---|
| Acetone | High | Use in a well-ventilated area, avoid skin contact |
| Isopropyl Alcohol | Medium | Less harsh, safer for most surfaces |
| Lacquer Thinner | High | Use gloves, ensure good ventilation |
For textured walls where adhesives like 3M tapes may not adhere well, mechanical fasteners such as small hook or loop fasteners, screws, or picture hangers might be necessary (Quora).
Learn about other methods, such as how to remove adhesive residue from vinyl, or explore different types of adhesives in our comparison articles like b7000 vs super glue.
These methods ensure the removal of LED strip lights and their adhesive without harming your painted walls, keeping them clean and ready for future use.
Maintenance and Enhancement Tips
Proper maintenance and enhancement techniques can prolong the life of your LED strip lights and ensure they function optimally. Here are some tips to help you take care of your lighting setup.
Preventing Residue Buildup
Residue buildup can be a common issue when using adhesives to mount LED strip lights. Here are some strategies to minimize this problem:
- Removable Adhesive Hooks: Use hooks that can be easily removed from the wall without leaving adhesive residue.
- Painter’s Tape: Secure the LED strips with painter’s tape, which is designed to be removed cleanly.
- Non-Permanent Adhesive Strips: Use adhesive strips that are specifically designed to leave no residue.
- Detachable Bases: Opt for LED strips that come with detachable bases to simplify the removal process.
These methods are useful in maintaining a clean wall surface when you decide to remove or reposition your LED strips. For more detailed guidance on removing adhesive residue, check out our article on how to remove LED strip lights adhesive.
Customization with Dimmers and Controllers
Customizing your LED strip lights with dimmers and controllers can enhance your lighting experience. Here are some ways you can use these tools:
- Dimmers: Adjust the brightness of your LED strips according to the ambiance you desire. Dimmers can help create a relaxed atmosphere or provide brighter lighting when needed.
- Color Controllers: Some LED strips come with controllers to change colors. This feature allows for a dynamic lighting experience that can be customized for different occasions.
- LED Strip Connectors: Ensure you use connectors specifically designed for LED strips. Proper connectors ensure secure and correct connections.
- Dimming Controllers: LED dimming controllers provide additional flexibility in brightness control for different settings.
For those interested in a detailed guide on setting up and utilizing controllers, read our post on how to connect an LED strip to a power supply.
Recommended Accessories
To make the most out of your LED strip lighting, consider investing in the following accessories:
| Accessory Type | Benefits |
|---|---|
| Heat Protectant Spray | Shields LED strips from heat exposure |
| Detachable Bases | Simplifies the mounting and removal process |
| High-Quality Connectors | Ensures secure and correct connections |
| Dimming Controllers | Offers greater control over brightness levels |
Proper mounting using the correct adhesive or mounting brackets designed for LED strip lights is essential for ensuring the performance and longevity of the lighting system (LEDYi Lighting). This emphasizes the importance of a secure attachment during installation.
For additional guidance on adhesives, check out these related articles:
