How to Remove LED Strip Lights Adhesive Safely
Efficient Removal of Adhesive
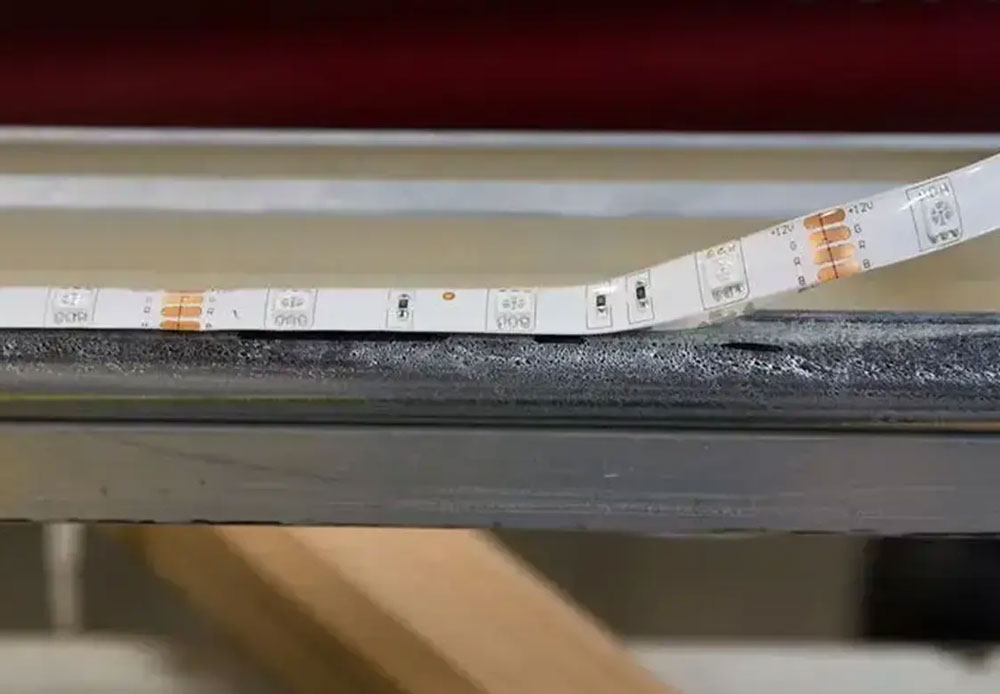
Removing LED strip lights’ adhesive efficiently is key to avoiding damage to surfaces and reapplying new adhesive smoothly. There are a couple of effective methods that can help achieve this.
Using Heat for Adhesive Removal
Using heat to remove adhesive from LED strip lights is a popular and effective method. The heat softens the adhesive, making it easier to peel away from the surface without causing damage. Here’s how you can do it:
- Tools Needed: Hairdryer or heat gun
- Instructions:
- Turn on the hairdryer or heat gun and set it to a medium heat setting.
- Hold the hairdryer or heat gun about 2-3 inches away from the adhesive.
- Move the hairdryer or heat gun back and forth over the adhesive for about 1-2 minutes, allowing the heat to soften the glue.
- Gently peel away the LED strip light. If the adhesive is still stubborn, apply more heat until it loosens.
| Tool | Heat Level | Distance | Time |
|---|---|---|---|
| Hairdryer | Medium | 2-3 inches | 1-2 minutes |
| Heat Gun | Medium | 2-3 inches | 1-2 minutes |
Using heat is particularly useful for larger strips where adhesive might be more robust. Make sure not to overheat the surface to prevent any potential damage.
Utilizing Goo Gone or Adhesive Remover
Goo Gone or other adhesive removers are effective for cleaning off the stubborn sticky residue left behind after LED strip light removal. They break down the adhesive, making it easier to wipe off. Here’s a simple guide:
- Tools Needed: Goo Gone or any adhesive remover, a soft cloth
- Instructions:
- Apply a small amount of Goo Gone or an adhesive remover to a soft cloth.
- Gently rub the cloth over the adhesive residue in a circular motion.
- Let it sit for a few minutes to allow the remover to penetrate and break down the adhesive.
- Wipe off the adhesive with the cloth.
- For any remaining residue, repeat the process until the surface is clean.
| Product | Application Method | Time | Repeat |
|---|---|---|---|
| Goo Gone | Soft cloth | 2-3 minutes | As needed |
| Adhesive Remover | Soft cloth | 2-3 minutes | As needed |
Using an adhesive remover is ideal for smaller sections or for surfaces that may be more sensitive to heat. Remember, always follow the manufacturer’s instructions when using chemical products to ensure safety.
For further steps on prepping your surface for reapplication, visit our guide on how to stick led strip lights on wall. If you’re dealing with stubborn adhesives, our article on how to remove 3m adhesive from walls might also be helpful.
Removal Techniques and Tools
Removing LED strip lights adhesive can be challenging. Utilizing efficient methods and the right tools can ease this process significantly.
Isopropyl Alcohol Method
Isopropyl alcohol is a versatile adhesive remover. It is effective for dissolving the adhesive used in LED strip lights. To use this method:
- Gather Materials: Isopropyl alcohol (70% or higher), soft cloth, gloves.
- Apply Alcohol: Dab the cloth with isopropyl alcohol.
- Rub Gently: Gently rub the adhesive in a circular motion to dissolve it.
- Wipe Clean: Use a clean cloth to wipe away the dissolved adhesive.
Using isopropyl alcohol is a straightforward and accessible method, ensuring minimal damage to the surface. For additional details on adhesive properties, visit our article on how to remove adhesive from glass mirror.
Vinegar as an Adhesive Remover
Vinegar is an eco-friendly alternative for removing adhesive. Its acidic nature helps break down the adhesive. To use this method:
- Mix Solution: Combine equal parts vinegar and water.
- Soak Cloth: Soak a soft cloth in the vinegar solution.
- Apply to Adhesive: Place the soaked cloth on the adhesive for a few minutes.
- Scrub Gently: Gently scrub the area to remove the adhesive.
- Rinse Surface: Rinse the surface with water and dry it thoroughly.
This method is effective for most surfaces and ensures that no harsh chemicals are used. For more adhesive removal techniques, refer to how to remove windshield adhesive without damage.
Importance of Surface Cleaning
Proper surface cleaning is crucial before applying new adhesive to ensure a strong, lasting bond. Cleaning the surface thoroughly helps prevent residue build-up and promotes adhesion:
- Initial Wipe: Use a damp cloth to wipe away dust and debris.
- Deep Clean: Apply an appropriate cleaning solution depending on the surface material.
- Dry Completely: Ensure the surface is completely dry before applying new adhesive.
Effective surface preparation can prevent issues such as reduced adhesion and sticky residue. For tips on surface preparation and less impactful adhesive options, visit construction adhesive vs. caulk.
By employing these techniques and tools, removing LED strip lights adhesive can be simple and efficient, safeguarding your surfaces while ensuring optimal reapplication conditions. For more in-depth information on handling various adhesives, check our comparison articles like e6000 vs. e8000 glue.
Considerations for Reapplication
Successfully removing LED strip lights’ adhesive is just one part of the process. Once the adhesive is removed, it’s essential to reapply it correctly, consider the types of LED strip lights, and understand how to cut and solder the strips if needed.
Reapplying Adhesive Correctly
Reapplying adhesive to LED strip lights needs careful preparation and execution for a secure and long-lasting bond. Here’s how to do it correctly:
-
Clean the Surface: Ensure the surface is clean, dry, and free of any residue before reapplying adhesive. Consider surface preparation techniques to remove any remaining particles.
-
Choose the Right Adhesive: Use a suitable adhesive tape or glue designed for LED strips. Often, brands like B7000 vs. Super Glue offer good options.
-
Apply Evenly: Spread the adhesive evenly and press firmly to ensure it sticks properly.
-
Allow Time to Set: Give the adhesive adequate time to set and cure, following the manufacturer’s instructions.
By following these steps, you can avoid premature detachment and ensure a strong bond between your LED strip and the mounting surface.
Types of LED Strip Lights
Each type of LED strip light may have specific characteristics and requirements for reapplication and use. Here are a few common types:
| Type | Features |
|---|---|
| SMD | Surface-Mounted Device LEDs; versatile, high brightness, and available in various colors. |
| COB | Chip on Board LEDs; provides uniform light with minimal heat output. |
| Black PCB | Offers aesthetic appeal with a black backing, often used in modern design applications. |
For more details on the variety of LED strips available, refer to the ultimate guide on LED strip lighting by Super Bright LEDs.
Cutting and Soldering LED Strips
Cutting and soldering LED strip lights allows for customization in length and configuration. Here’s what you need to know:
-
Cutting LED Strips: LED strips can typically be cut along designated cut lines, marked every 1-2 inches. Use sharp scissors and follow the markings to avoid damaging the circuit.
-
Soldering LED Strips: Soldering may be necessary to reconnect cut segments or to attach additional wiring. Ensure all power sources are disconnected before starting. Solder carefully to avoid heat damage to the LED components.
-
Solderless Connectors: For those uncomfortable with soldering, solderless connectors provide a convenient alternative. They allow for easy reconnection without the need for soldering.
| Task | Tools Needed |
|---|---|
| Cutting LED Strips | Sharp scissors, ruler, and clean cutting surface. |
| Soldering LED Strips | Soldering iron, solder, heat shrink tubing, and a steady hand. |
| Using Solderless Connectors | Solderless connectors, pliers, and appropriate connector type for the LED strip. |
For more guidance on safely handling and modifying LED strips, check out how to stick LED strip lights on wall.
By understanding these considerations, you can ensure your LED strip lights not only remain in optimal condition but also perform efficiently. Whether you’re reapplying adhesive, cutting, or soldering, following these guidelines will help maintain the functionality and aesthetic appeal of your LED lighting setup.
Adhesive Types and Properties
Understanding the different types of adhesives used in LED strip lights is crucial for effective removal and reapplication. The most common adhesives are acrylic, silicone, and rubber-based adhesives. Each type has unique characteristics that influence its performance and ease of removal.
Acrylic vs. Silicone Adhesives
Acrylic and silicone adhesives are two popular choices for LED strip lights. Here are their key properties:
| Property | Acrylic Adhesive | Silicone Adhesive |
|---|---|---|
| Bond Strength | Strong | Moderate |
| Temperature Resistance | Up to 150°C | Up to 200°C |
| Moisture Resistance | Good | Excellent |
| Flexibility | Low | High |
| Residue on Removal | Often Residue | Minimal Residue |
-
Acrylic Adhesives:
- Bond Strength: Acrylic adhesives create a strong bond, making them excellent for permanent applications. This strength can make removal challenging and often leaves behind sticky residue.
- Temperature Resistance: They can withstand temperatures up to 150°C, making them suitable for environments with moderate heat.
- Moisture Resistance: They offer good resistance to moisture, though not as high as silicone adhesives.
- Flexibility: Acrylic adhesives tend to be less flexible, meaning they might not adhere well to uneven surfaces.
- Residue: They frequently leave residue upon removal, which may require additional cleaning methods such as using an adhesive remover.
-
Silicone Adhesives:
- Bond Strength: Silicone adhesives provide a moderate bond that allows for easier removal compared to acrylic adhesives.
- Temperature Resistance: They can handle temperatures up to 200°C, making them suitable for high-temperature conditions.
- Moisture Resistance: Silicone adhesives excel in resisting moisture, making them ideal for humid environments.
- Flexibility: They are very flexible, adapting well to a variety of surface types, including uneven ones.
- Residue: These adhesives tend to leave minimal residue, simplifying the cleaning process (Super Bright LEDs).
For more tips on removing adhesive residue, visit our article on how to remove adhesive residue from vinyl.
Understanding Rubber-Based Adhesives
Rubber-based adhesives are another option commonly used for LED strip lights installation. Here are their key characteristics:
- Adhesion Strength: Rubber-based adhesives offer a strong initial bond that remains flexible over time. This makes them suitable for surfaces that may experience movement or vibration.
- Temperature Tolerance: These adhesives typically perform well in a range of temperatures but may soften under extreme heat, which can affect adhesion.
- Humidity Resistance: Rubber-based adhesives have good moisture resistance but are generally not as effective as silicone adhesives.
- Flexibility: Highly flexible, they are capable of adhering to uneven and curved surfaces.
- Residue on Removal: Rubber-based adhesives can leave a sticky residue, similar to acrylic adhesives. Using isopropyl alcohol or adhesive remover can help in cleaning off any leftover adhesive (VST Lighting).
| Property | Rubber-Based Adhesive |
|---|---|
| Bond Strength | Strong Initial Bond |
| Temperature Resistance | Good |
| Humidity Resistance | Good |
| Flexibility | High |
| Residue on Removal | Often Residue |
Selecting the right type of adhesive for your LED strip light installation depends on various factors including the surface type, environmental conditions, and whether future removal is anticipated. For more insights on adhesives, see our guide on how does contact adhesive work.
Preventing Residue Build-Up
LED strip lights offer a striking way to enhance a space, but dealing with adhesive residue can be a nuisance. By taking preventive measures and considering less impactful options, one can mitigate the hassle.
Surface Preparation for Installation
Proper surface preparation is crucial to avoid pesky adhesive residue. Ensuring the application area is clean and dry can significantly improve the adhesion and prevent future messes. This includes wiping the surface with a mild cleaner and letting it dry completely before applying the LED strip lights.
Steps for surface preparation:
- Clean the surface with a mild cleaner.
- Allow the surface to dry completely.
- Gently apply the LED strips evenly.
| Step | Action |
|---|---|
| 1 | Clean surface with mild cleaner |
| 2 | Dry surface completely |
| 3 | Apply LED strips evenly |
More about how to stick LED strip lights on wall.
Exploring Less Impactful Adhesive Options
When it comes to minimizing the impact of adhesives, several options stand out. Certain LED strip products come with less aggressive adhesive solutions, which makes them easier to remove without residue. Exploring LED strip variants featuring reusable or peel-away non-permanent adhesives can prove beneficial.
Types of Adhesive Options:
- Reusable adhesive backing
- Peel-away non-permanent adhesive
- Pressure-sensitive adhesive with lower tack
These options provide the convenience of easy installation and removal, reducing the likelihood of damaging the surface.
For those seeking to avoid the bulk of adhesive residue altogether, it may be worthwhile to invest in high-quality adhesive products known for their ease of removal. Products like isopropyl alcohol or specialized adhesive removers can also be applied subsequently to ease the cleaning process (VST Lighting).
For more on adhesives, explore our articles on:
By focusing on proper preparation and selecting appropriate adhesives, one can enjoy the benefits of LED strip lighting without dealing with inconvenient residue.
Expert Tips for Removal
Mastering the removal of adhesive from LED strip lights is key to maintaining the integrity of both the lights and the surfaces they’re attached to. Following expert tips can make this process efficient and minimize potential damage.
Safe and Efficient Removal Practices
Removing the adhesive safely and effectively involves the right practices and tools:
-
Heat Application: Warm the adhesive using a hairdryer or heat gun on a low to medium setting. This softens the adhesive, making it easier to peel off without causing damage. Ensure the heat is distributed evenly to prevent any harm to the LED strip or the mounting surface (VST Lighting).
-
Peeling Technique: Gently peel off the LED strip at a 45-degree angle. This minimizes the amount of residue left behind. Start at one end and go slow to ensure the adhesive comes off with the strip.
-
Removing Residue: For remaining adhesive, use an adhesive remover like Goo Gone, isopropyl alcohol, or a vinegar solution. A plastic scraper or a credit card can help lift the residue without scratching the surface (VST Lighting).
-
Additional Tools: For tougher adhesives, consider using dental floss or fishing line to slice through the adhesive, or apply a silicone-based spray like WD-40 to break the adhesive grip (VST Lighting).
Repairing Minor Surface Damage
Sometimes, despite best efforts, minor damage to the surface can occur during adhesive removal:
-
Surface Scratches: For minor scratches, use a gentle polishing compound or a mixture of baking soda and water to buff out the marks.
-
Paint Touch-Ups: If paint is peeled away, minor touch-ups with matching paint can restore the surface to its original condition.
-
Fillers: Small dents or gouges can be filled with a repair filler appropriate for the surface type, then sanded and repainted if necessary.
| Damage Type | Repair Method |
|---|---|
| Minor Scratches | Polishing compound, baking soda and water mixture |
| Paint Peeling | Touch-up paint |
| Small Dents | Surface-specific filler, sand, and repaint |
Knowing When to Seek Professional Help
In some instances, professional assistance is the safest route:
-
Delicate Surfaces: When dealing with delicate surfaces like wallpaper or intricate woodwork, professionals can ensure the adhesive is removed without causing damage.
-
Stubborn Residues: For extremely stubborn adhesives that do not respond to standard removal methods, professionals have specialized tools and solvents.
-
Electrical Disconnections: If LED strips are hardwired into the electrical system, an expert can handle disconnections safely, adhering to electrical standards to prevent any hazards.
Professionals are trained to manage these situations effectively, maintaining both safety and the quality of the surface. For more information on dealing with adhesives and choosing the right options, explore articles like how to remove weatherstrip adhesive and how to remove car emblem adhesive.
Implementing these expert tips will facilitate a smoother removal process, ensure efficiency, and help maintain the integrity of your surfaces.
