How To Remove Self-Adhesive Shower Door Handles Easily
Understanding Self-Adhesive Shower Door Handles
Self-adhesive shower door handles are a convenient solution for easy installation and maintenance. This section delves into their components and the process of installing new handles.
Identifying Handle Components
To properly identify the components of self-adhesive shower door handles, consider the following elements:
-
Handle Sides: Typically, a shower door handle consists of two sides. One side will have solid ends, and the other will feature set screws. Position the set screws on the outside of the shower door for easier access and cleaning (Affordable Frameless).
-
Adhesive Pad: The adhesive pad is crucial for attachment. It ensures the handle stays securely fixed to the door surface without needing additional hardware.
-
Set Screws: These small screws secure the handle to the adhesive pad. They are generally found on one side of the handle.
Understanding these components is essential to both installing and removing self-adhesive shower door handles efficiently.
Installing New Shower Door Handles
Installing new shower door handles is a straightforward process. Follow these steps to ensure proper installation:
-
Clean the Surface: Before applying the new handle, clean the surface of the shower door thoroughly. Use a non-abrasive cleaner to remove any residue or dirt.
-
Position the Handle: Determine the ideal location for the handle. Ensure that it is within comfortable reach and aligns with the design of the shower door.
-
Apply the Adhesive Pad: Peel off the backing of the adhesive pad and press it firmly onto the door surface. Make sure there are no air bubbles trapped under the pad.
-
Attach the Handle: Align the handle with the adhesive pad and press it firmly into place. If your handle has set screws, ensure they are positioned on the outer side of the door.
-
Secure with Set Screws: Tighten the set screws to ensure the handle is securely attached. This step is essential for handles with multiple connection points to the door (DK Hardware).
Once installed, regularly check the handle for any signs of loosening. This ensures the handle remains secure and prevents accidental falls or damage.
For further information on choosing the best adhesives for various surfaces and additional tips on installation, visit our articles on how to use construction adhesive without gun and how to remove adhesive from shower walls.
Removal of Self-Adhesive Residue
Removing adhesive residue after detaching self-adhesive shower door handles can be a daunting task. The following methods are effective for different surface types and will address how to correctly remove adhesive residue while avoiding damage.
From Metal Surfaces
To remove adhesive residue from metal surfaces, using rubbing alcohol or isopropyl alcohol initially is recommended. These substances won’t damage metal surfaces and are effective at breaking down adhesives.
| Substance | Method | Effectiveness |
|---|---|---|
| Rubbing Alcohol | Apply with a cloth and rub | High |
| Baby Oil | Apply, let sit, then rub | Medium |
For more detailed techniques, check our guide on how to remove adhesive from aluminum.
From Plastic Surfaces
Removing adhesive residue from plastic surfaces requires gentle methods to avoid damage. Start with warm, soapy water followed by vinegar.
| Substance | Method | Effectiveness |
|---|---|---|
| Warm, Soapy Water | Soak and scrub with cloth | Medium |
| Vinegar | Apply with a cloth and rub | High |
Visit our comprehensive guide on how to remove adhesive residue from vinyl for more insights.
From Wood Surfaces
Wood surfaces require careful handling when removing adhesive residue. Multiple methods can be used, starting from the least invasive to the most.
| Method | Substance | Effectiveness |
|---|---|---|
| Damp Cloth | Water | Low |
| Heat Application | Blow Dryer | Medium |
| Household Products | White Vinegar, Vegetable Oil | High |
| Commercial Removers | Glue Removers | High |
| Chemical Solvents | Lighter Fluid, Acetone | Very High |
| Mechanical Removal | Sanding | Medium – High |
Learn more about removing adhesive from wood in our article on how to remove adhesive from unfinished wood.
From Glass Surfaces
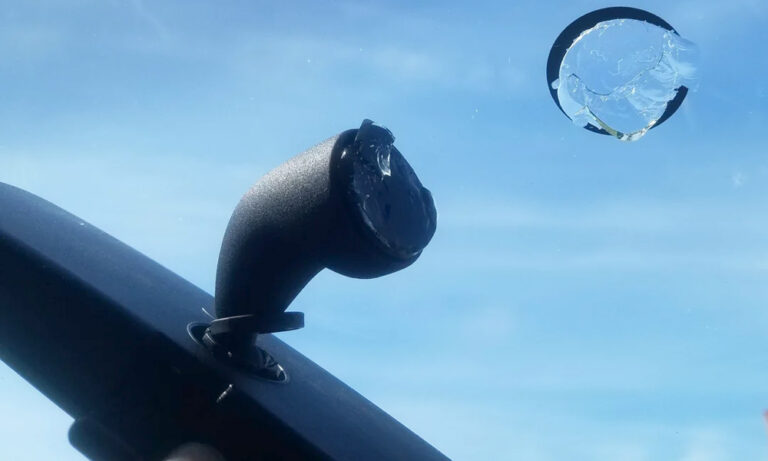
Acetone, commonly found in nail polish removers, is highly effective at removing adhesive residue from glass surfaces. Additionally, a small amount of spray lubricant can help.
| Substance | Method | Effectiveness |
|---|---|---|
| Acetone | Apply and scrub with cloth | Very High |
| Spray Lubricant | Apply, let sit, then rub | High |
Check out our detailed guide on how to remove adhesive from glass mirror for more techniques.
From Fabric Surfaces
Fabric surfaces might need a more specialized approach to remove adhesive residue. Commercial stain removers are highly recommended. For deeper cleaning, spot cleaning is effective.
| Method | Substance | Effectiveness |
|---|---|---|
| Commercial Stain Removers | Follow product instructions | Very High |
| Spot Cleaning | Detergent, Ammonia diluted in hot water, Hand Sanitizer | High |
For further information, refer to our article on how to remove led strip lights adhesive.
Using these specific methods ensures that self-adhesive residues are removed without causing damage to the various surfaces. For additional tips and guides on adhesive removal, explore our related articles.
Specialty Cases: Weatherstrip Adhesive
Properties of Weatherstrip Adhesive
Weatherstrip adhesive is usually made from rubber-based or synthetic materials, which offer robustness and flexibility. This adhesive type is designed to endure diverse conditions such as air, water, and dust, making it essential for sealing applications in both homes and vehicles (Window Hardware Direct).
Mechanical Removal Techniques
Mechanical methods involve physical tools to scrape or peel off weatherstrip adhesive. Common tools used for this process include:
- Plastic scrapers
- Razor blades
- Putty knives
These tools should be used carefully to avoid scratching or damaging the underlying surface. For more detailed steps, visit our guide on how to remove weatherstrip adhesive.
Chemical Solvents for Removal
Chemical solvents can effectively break down the stubborn bonds of weatherstrip adhesive. Solvents such as acetone, rubbing alcohol, or commercial adhesive removers are often recommended. When using chemical solvents, it is crucial to:
- Test the solvent on a small, inconspicuous area first.
- Apply the solvent with a cloth or sponge.
- Allow it to sit for a few minutes.
- Wipe away the dissolved adhesive.
Always consult product guidelines for safety and usage precautions.
| Solvent Type | Effectiveness | Caution Needed? |
|---|---|---|
| Acetone | High | Yes |
| Rubbing Alcohol | Medium | Moderate |
| Commercial Adhesive Removers | High | Yes |
Heat Application for Removal
Applying heat can soften weatherstrip adhesive, making it easier to remove. A heat gun or hairdryer can be used for this purpose. The process involves:
- Setting the heat source to a low or medium setting.
- Gradually heating the adhesive for a few minutes.
- Using a scraper to peel off the softened adhesive.
It’s essential to move the heat source continually to avoid overheating any one spot, which could potentially damage the surface. For more tips on adhesive removal, explore our article on how to remove adhesive from shower wall.
Understanding these methods and properties can help you effectively remove self-adhesive shower door handles and other types of weatherstrip adhesives. For comparisons of different adhesives, check out e6000 vs. epoxy and e6000 vs. super glue.
Causes of Weatherstrip Adhesive Failure
Understanding the factors that contribute to weatherstrip adhesive failure is crucial for ensuring a successful application. Below are some common causes:
Improper Application Techniques
Improper application techniques significantly impact the effectiveness of weatherstrip adhesive. This includes not allowing the adhesive to cure fully, applying an insufficient amount, or not pressing firmly enough. Ensuring proper application is essential for avoiding failures. Visit our guide on how to use construction adhesive like a pro for detailed tips.
Surface Contamination
Surface contamination is another leading cause of adhesive failure. Dirt, oils, and residues can prevent the adhesive from bonding properly. Cleaning the surface thoroughly before applying the adhesive is critical. Check out how to remove adhesive residue from vinyl for effective cleaning tips.
Temperature Extremes
Temperature extremes can compromise the adhesive’s performance. Both very high and very low temperatures can affect the adhesive’s ability to set and maintain its bond. Following the manufacturer’s recommended temperature settings is vital.
Aging Effects
Over time, weatherstrip adhesive may degrade due to aging effects. Exposure to elements such as UV rays, humidity, and air pollutants can weaken the adhesive, causing it to lose its efficacy. Regular inspection and timely replacement of weatherstrip adhesive can mitigate these issues. See our article on how to remove weatherstrip adhesive for further insight.
Mechanical Stress Issues
Mechanical stress, such as repeated opening and closing of doors or windows, can place undue stress on the adhesive bond. Constant mechanical wear can lead to premature adhesive failure. Applying the adhesive correctly and ensuring it has adequately cured can help counteract mechanical stress. Refer to our guide on how to remove adhesive hooks from walls for additional guidelines.
By understanding these factors, one can more effectively address and prevent weatherstrip adhesive failures. For further reading on adhesives and their applications, explore our comprehensive guides on how to use contact adhesive properly and how to use gorilla construction adhesive.