How To Remove Weatherstrip Adhesive: Complete Guide
Removing Weatherstrip Adhesive
Removing weatherstrip adhesive effectively requires the right tools, materials, and preparation. This section outlines what is needed and the initial steps to take.
Tools and Materials Needed
To remove weatherstrip adhesive, gather the following tools and materials:
- 3M Adhesive Cleaner (Low VOC) (Steele Rubber Products)
- Gloves
- Safety glasses
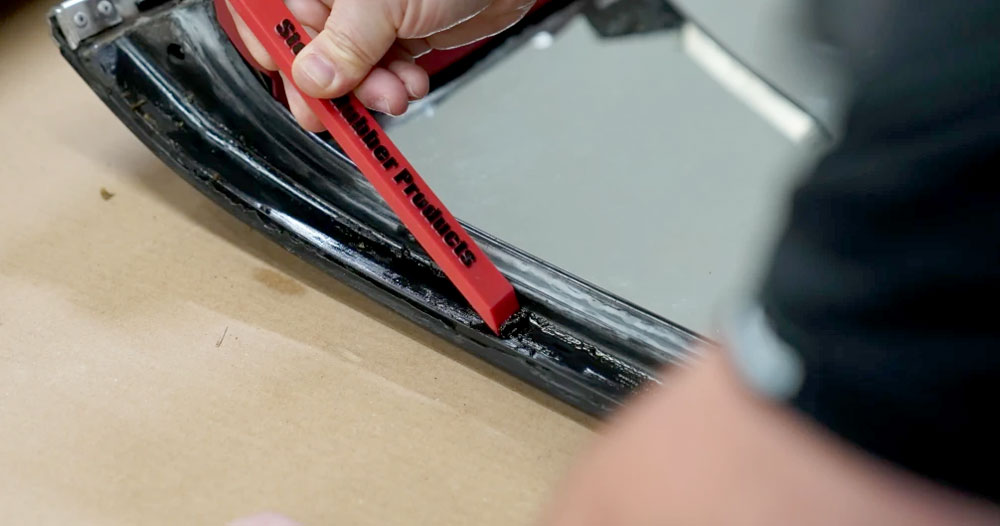
- Razor scraper or plastic scraper
- Shop towels or rags
- Isopropyl alcohol
- Bucket of warm soapy water
- Wire brush (optional)
- Hairdryer or heat gun
Here is a table summarizing the tools and their purposes:
| Tool/Material | Purpose |
|---|---|
| 3M Adhesive Cleaner | Softens and removes adhesive |
| Gloves | Protect hands |
| Safety Glasses | Protect eyes |
| Razor/Plastic Scraper | Scrape off old adhesive |
| Shop Towels/Rags | Clean residual adhesive |
| Isopropyl Alcohol | Final cleaning |
| Soapy Water | Initial surface cleaning |
| Wire Brush | Remove tough residues |
| Hairdryer/Heat Gun | Soften adhesive |
Preparing the Surface
Proper preparation of the surface is crucial to ensure successful removal of weatherstrip adhesive. Follow these steps to prepare the surface:
- Clean the Area: Start by cleaning the surface with a bucket of warm soapy water to remove any dirt, debris, or dust. This initial cleaning helps make the removal process smoother (Window Hardware Direct).
- Dry the Surface: Ensure the area is fully dry before applying any adhesive cleaner. Moisture can interfere with the removal process and reduce the effectiveness of the adhesive cleaner.
- Apply Adhesive Cleaner: Spray the 3M Adhesive Cleaner directly on the weatherstrip adhesive. Allow it to penetrate and soften the adhesive for a few minutes (Steele Rubber Products).
- Prepare to Scrape: Use a razor scraper or plastic scraper to gently peel off the softened adhesive. Start with a plastic scraper to avoid damaging the surface, switching to a razor scraper if necessary (Seashore Rubber).
- Repeat if Necessary: It may take a few applications of adhesive cleaner and scraping to fully remove the old adhesive. Patience is key to ensure thorough removal without damaging the surface.
For more detailed tips and techniques, check out the articles on how to use contact adhesive properly and how to remove car emblem adhesive. Proper surface preparation sets the stage for the next steps in the adhesive removal process and prevents potential issues during reinstallation.
Techniques for Adhesive Removal
Removing weatherstrip adhesive can be challenging without the right techniques. Here, we explore three effective methods: using chemical adhesive removers, applying heat for softening, and safe scraping methods.
Using Chemical Adhesive Removers
Chemical adhesive removers are highly effective in breaking down the bonds of weatherstrip adhesive. Products like Goo-Gone or 3M Adhesive Cleaner Low VOC work well on various surfaces (3M Adhesive Cleaner for weatherstripping).
| Chemical Remover | Effectiveness | Precautions |
|---|---|---|
| Goo-Gone | High | Ventilate area, avoid prolonged skin contact |
| 3M Adhesive Cleaner Low VOC | High | Use gloves, work in well-ventilated area |
To use these products:
- Apply the adhesive remover to the affected area.
- Allow the solution to sit for the recommended time (usually 5-10 minutes).
- Wipe off the softened adhesive with a clean cloth.
For more tips on adhesive removal, check out how to remove adhesive residue from vinyl.
Applying Heat for Softening
Heat is a valuable ally in softening weatherstrip adhesive. A blow dryer or heat gun can be used to warm the adhesive, making it easier to remove.
Steps for Using Heat:
- Hold the blow dryer or heat gun a few inches away from the adhesive.
- Apply heat evenly across the adhesive for 1-2 minutes.
- Use a plastic scraper to gently lift the softened adhesive.
Heating is particularly effective in combination with chemical removers. However, care must be taken to avoid overheating, which can damage the surrounding surface. For more details, visit how to remove adhesive from aluminum.
Safe Scraping Methods
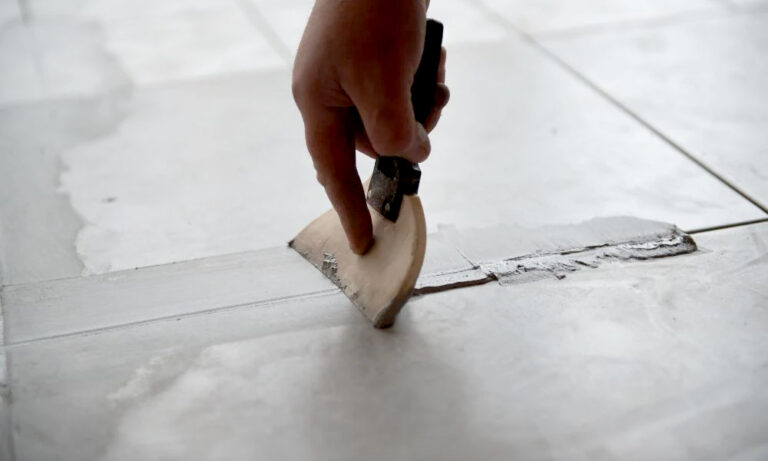
Safe scraping methods involve using tools to physically remove the adhesive without damaging the surface. Tools such as plastic scrapers, putty knives, or even old credit cards work well.
Scraping Techniques:
- Begin with a gentle scraping tool like a plastic scraper.
- Work at a shallow angle to avoid gouging the surface.
- Use slow, controlled motions to lift the adhesive.
| Tool | Effectiveness | Surface Safety |
|---|---|---|
| Plastic Scraper | Moderate | High |
| Putty Knife | High | Moderate |
| Old Credit Card | Moderate | High |
In situations where precision is required, safer scraping methods can be supplemented with chemical removers or heat treatments. For additional tips, see how to remove 3m adhesive from walls.
By integrating these techniques, one can effectively manage the challenge of weatherstrip adhesive removal while minimizing the risk of surface damage. Always consider the type of adhesive and the sensitivity of the surface being cleaned before selecting the appropriate method. For a broader understanding of adhesive types and applications, refer to how does contact adhesive work.
Steps for Weatherstrip Adhesive Removal
When learning how to remove weatherstrip adhesive, there are key steps to follow to ensure a smooth and efficient process. This section will detail each step, including cleaning the area, applying adhesive cleaner, and wiping off the residual adhesive.
Cleaning the Area
Before beginning the adhesive removal process, it is crucial to properly clean the area to ensure there is no debris or dirt that could interfere. Use a mild cleaning solution or soapy water to gently clean the surface where the adhesive is present. This will help to ensure that the adhesive remover can work more effectively.
Applying Adhesive Cleaner
One effective way to remove weatherstrip adhesive is by using a chemical adhesive remover. A popular choice is the 3M Adhesive Cleaner Low VOC (Steele Rubber Products). This product is recommended for removing leftover adhesive from any surface, including surfaces with weatherstrips.
- Spray the adhesive cleaner directly onto the adhesive-covered areas.
- Allow the cleaner to sit for several minutes to penetrate and soften the adhesive.
- Ensure you follow the adhesive cleaner’s instructions for proper usage and safety.
Wiping Off Residual Adhesive
After the adhesive cleaner has had time to work, the next step is to wipe off the softened adhesive. Use a shop towel, rag, or scraper tool to gently remove the adhesive. You may need to repeat this process a few times to fully break down and remove all the adhesive.
| Step | Description |
|---|---|
| Cleaning the Area | Remove debris and dirt using a mild cleaning solution |
| Applying Adhesive Cleaner | Spray 3M Adhesive Cleaner Low VOC and let it sit |
| Wiping Off Residual Adhesive | Use a rag or scraper tool to remove softened adhesive |
Following these steps will help you efficiently remove weatherstrip adhesive without causing damage to the surface. For further information on topics like how to remove car emblem adhesive or how to remove adhesive from unfinished wood, explore our extensive guides available on the website.
Preventing Damage and Ensuring Safety
When removing weatherstrip adhesive, preventing damage to surfaces and ensuring personal safety are paramount. Proper preparation and the right protective gear can make the process smoother and safer.
Importance of Surface Preparation
Preparing the surface is a critical step in the removal process. Skipping surface cleaning is a common mistake that can lead to inefficiencies during weatherstripping installation. Dirt and debris can prevent the adhesive from sticking properly (Seashore Rubber). Ensuring the surface is clean, dry, and free of old adhesive or debris is essential before beginning any removal process.
- Clean the area: Use a mild soap and water solution to remove dirt.
- Dry the surface: Ensure the area is completely dry before applying any chemical remover. Moisture can hinder the effectiveness of the adhesive removal process.
- Remove old adhesive: Achieve this using a scraper or a shop towel.
| Steps | Description |
|---|---|
| Cleaning the Area | Remove all visible dirt and debris. |
| Drying the Surface | Ensure no moisture is present. |
| Removing Old Adhesive | Use tools such as scrapers. |
Protective Gear Recommendations
Using the right protective gear is crucial when handling chemical adhesive removers and other tools for the removal process. Adhesive removers often contain chemicals that can be harmful if they come in contact with skin or eyes, or if inhaled. Wearing appropriate protective gear can prevent accidents and ensure safety.
- Gloves: Use chemical-resistant gloves to protect your hands from exposure to harsh chemicals.
- Safety Goggles: Wear safety goggles to shield your eyes from potential splashes of adhesive remover.
- Mask: A mask or respirator can help avoid inhaling any fumes or particles.
- Long-sleeved Clothing: Wearing long-sleeved clothing can protect your skin from accidental spills or splashes.
| Protective Gear | Purpose |
|---|---|
| Gloves | Protect hands from chemicals. |
| Safety Goggles | Shield eyes from splashes. |
| Mask | Prevent inhalation of fumes. |
| Long-sleeved Clothing | Protect skin from spills. |
Proper surface preparation and the use of protective gear are essential components of safely removing weatherstrip adhesive. For detailed guidelines on adhesive removal, visit our articles on how to remove adhesive from unfinished wood and how to remove adhesive from glass mirror.
Potential Issues and Solutions
Understanding the potential issues and solutions related to weatherstrip adhesive can help you avoid common pitfalls and ensure a successful removal process. Two critical aspects to consider are understanding adhesive failure and the types of weatherstripping adhesives.
Understanding Adhesive Failure
Adhesive failure occurs when the glue no longer bonds effectively to the weatherstripping material, causing leaks, air or water intrusion, and interference with door and window movement (Metro Moulded Parts). Several factors contribute to adhesive failure, including:
- Contamination from grease or oil
- Improper application of adhesive
- Substrate compatibility issues
- Environmental conditions like high humidity and oxygen levels
| Cause of Failure | Description |
|---|---|
| Contamination | Presence of grease, oil, or other substances affecting adhesion |
| Improper Application | Incorrect amount or method of applying adhesive |
| Substrate Compatibility | Incompatibility between adhesive and weatherstripping material |
| Environmental Conditions | High humidity and oxygen impacting adhesive properties |
In some cases, substrate failure can occur when the adhesive becomes stronger than the material itself, leading to the breaking of the primary weatherstripping material (Seashore Rubber).
Types of Weatherstripping Adhesives
Understanding the types of weatherstripping adhesives is essential in selecting the right product for removal and replacement. Different adhesives possess unique properties suited to specific applications:
Rubber-Based Adhesives
Rubber-based adhesives are commonly used for weatherstripping applications due to their flexibility and durability. They provide strong bonding but can become brittle over time, causing the weatherstripping material to separate and create leaks (Metro Moulded Parts).
Acrylic Adhesives
Acrylic adhesives offer good resistance to solvents and environmental conditions. They are used in various weatherstripping applications and can be easily removed using chemical adhesive removers or heat application.
Silicone Adhesives
Silicone adhesives are known for their excellent flexibility and resistance to extreme temperatures. They are ideal for high-performance weatherstripping applications where exposure to harsh environments is expected.
Contact Adhesives
Contact adhesives are used for fast-acting bonding needs and are applied to both surfaces before joining them together. They offer strong adhesion but can be challenging to remove without proper techniques. If you want to learn more about how contact adhesives work, visit our article on how does contact adhesive work.
By understanding the potential issues and the different types of weatherstripping adhesives, you can effectively address any challenges that arise during the adhesive removal process. For further information on removing adhesive from different surfaces, check out our articles how to remove adhesive from unfinished wood and how to remove 3M adhesive from walls.
Maintenance Tips for Weatherstripping
Proper maintenance of weatherstripping is essential for preserving its effectiveness and prolonging its lifespan. Implement these maintenance tips to ensure optimal performance of your weatherstrip adhesive.
Regular Inspection and Cleaning
Conducting regular inspections and cleaning the weatherstripping can help identify issues early and prevent further damage.
Inspection Tips
- Visual Inspection: Examine the weatherstripping for signs of wear and tear, such as cracks, tears, or rigidity.
- Functional Test: Close doors and windows and check for drafts. Presence of air leaks suggests that the weatherstripping needs maintenance or replacement.
Cleaning Instructions
- Materials Needed: Soft cloth or sponge, mild soap, and water.
- Cleaning Steps:
- Dampen a soft cloth or sponge with soapy water.
- Gently wipe the weatherstripping to remove dirt and debris.
- Rinse with clean water and dry with a soft towel.
Regular cleaning can help maintain the adhesive’s integrity and prolong the life of your weatherstripping. For more detailed instructions on adhesive maintenance, check out our guide on how to remove adhesive from aluminum.
Replacement Guidelines
Over time, weatherstripping can deteriorate and may require replacement. Follow these guidelines to determine when and how to replace it.
When to Replace
- Visible Damage: Replace weatherstripping if there are noticeable cracks, tears, or signs of adhesive failure.
- Ineffectiveness: If drafts or moisture are entering through closed doors or windows, it’s time to replace the weatherstripping (Metro Moulded Parts).
Replacement Steps
- Removing Old Weatherstripping:
- Gently peel off the old weatherstripping.
- Use an adhesive remover to clean off residual adhesive.
- Preparing the Surface:
- Ensure the surface is clean and dry.
- Use a mild detergent to remove any dirt or grease.
- Applying New Weatherstripping:
- Measure and cut the new weatherstripping according to the required length.
- Peel back the adhesive liner and press the weatherstripping firmly into place.
- Ensure there are no gaps or overlaps.
Adhering to these maintenance tips will keep your weatherstripping in optimal condition. For more comparisons of adhesives, visit our articles like e6000 vs. super glue and e6000 vs jb weld.
By regularly inspecting, cleaning, and replacing weatherstripping when necessary, you can ensure that your home or vehicle remains well-sealed and energy-efficient. For further information on maintaining adhesives, explore more topics on our blog.

