Large Format vs Regular Mortar Guide
The Importance of Mortar for Large Format Tiles
Understanding the significance of mortar in the installation of large format tiles is crucial for achieving a durable and aesthetically pleasing result. Mortar, with its specific properties, plays an essential role in the successful installation of these types of tiles.
Difference Between Mortar and Grout
Mortar and grout serve distinct purposes in the tiling process. Mortar is a mixture of lime with cement, sand, and water. Its primary function is to bond bricks, stones, and tiles to the substrate (Arizona Tile).
| Material | Composition | Purpose |
|---|---|---|
| Mortar | Lime, cement, sand, water | Bonding tiles to surfaces |
| Grout | Cement, sand, water | Filling gaps between tiles |
Grout, on the other hand, is used to fill the spaces between tiles after they have been set with mortar. It provides a finished look and helps prevent moisture from seeping under the tiles. Using mortar, especially designed for large format tiles, ensures the tiles are securely bonded and able to withstand their weight without sagging.
For more on adhesive options, see our guide on how to use alien tape.
Benefits of Using Mortar for Large Tiles
The advantages of using specialized mortar for large format tiles are numerous. One such product is the Mapei Ultraflex LFT White Mortar, which is specifically designed for large tiles. This mortar is praised for its superior bonding properties and ease of application.
| Mortar Type | Features | Benefits |
|---|---|---|
| Mapei Ultraflex LFT White Mortar | Nonsag, large-and-heavy-tile mortar, Easy Glide Technology | Excellent adhesion, ease of application, suitable for heavy tiles |
| Medium-Bed Mortar | Resists shrinkage, compensates for irregularities | Secure bond, ideal for large tiles, prevents tile movement |
Using the correct type of mortar ensures that large format tiles are properly supported. Medium-bed mortars, for example, resist shrinkage and can accommodate slight irregularities in the substrate and tile, providing a secure bond.
Large-format tile projects also present unique challenges, such as the requirements for weight support and ensuring the flatness of the substrate. Solutions like non-sag thinset mortars are recommended for installations where gravity plays a significant role, such as on walls (Stone World).
For more in-depth guidance on gluing applications, check out our articles on 3m super strength and goo gone vs. wd-40.
By choosing the appropriate mortar, not only is the stability and longevity of the tile installation improved, but aesthetically pleasing and professional results can also be achieved.
Considerations for Large Format Tile Installations
Planning for Installing Large Tiles
When planning for the installation of large format tiles, such as 12-inch by 24-inch tiles or 48-inch-long planks, it is crucial to recognize the distinctive challenges they present. Contrary to common misconceptions, larger tiles require unique methods and specialized equipment for proper installation.
Before beginning the installation, consider the following planning steps:
- Evaluate the Area: Measure the area meticulously and plan the tile layout to minimize cuts and waste.
- Substrate Assessment: Ensure the substrate is suitable and strong enough to support the weight of large tiles. It should be free of cracks and debris.
- Purchase Adequate Materials: Ensure you have enough mortar, spacers, and additional supplies. Opt for high-quality large format tile mortar to ensure long-lasting results.
- Pre-Cut Tiles: Pre-cut tiles where necessary, especially for edges and corners, to streamline the installation process.
Tools and Techniques for Successful Installation
Large format tiles necessitate precise tools and techniques to achieve a seamless finish. According to the Tile Council of North America (TCNA) guidelines, substrates for large format tiles require exceptional flatness, with variations limited to 1/8” in 10 feet and no more than 1/16” in 24 inches.
Essential Tools:
- Trowels: Use a notched trowel appropriate for the size of the tile. Larger tiles often require larger notched trowels.
- Level: A long level is necessary to check the flatness of the substrate before installation.
- Tile Cutters: Wet saws or specialty tile cutters are needed for cutting large tiles accurately.
- Spacers: These are vital for maintaining even grout lines.
- Rubber Mallet: For lightly tapping tiles into place to ensure they are level.
Critical Techniques:
- Mortar Application: Use a high-quality medium-bed mortar to achieve the right bond. Ensure the mortar is mixed according to the manufacturer’s instructions.
- Back Buttering: Apply a layer of mortar to the back of each tile to ensure full coverage and eliminate voids.
- Setting Tiles: Start from the center of the room and work outwards. Place tiles gently into position and use a rubber mallet to ensure they are set evenly.
- Checking Levels: Regularly check tiles with a level to ensure they are even and that there is no lippage.
For large-format wall tile installations, additional factors like gravity, substrate flatness, secure bonding, and moisture control are critical. Using non-sag thinset mortars and mastics can help address these challenges.
By following these guidelines and understanding the specific needs of large-format tile installation, you can achieve a professional and enduring finish. For more information, explore articles on adhesive tile mats and how to make super glue for related setup and application techniques.
Factors Impacting Large Format Tile Projects
Weight and Support Requirements
Large format tile installations require meticulous attention to support due to the significant weight of the tiles. Larger tiles are inherently heavier than their smaller counterparts, necessitating proper support systems during the setting process to prevent any displacement. Ensuring adequate backing is crucial to avoid issues that may arise from insufficient support.
For large format tiles, it is important to use a suitable medium-bed mortar that can accommodate the weight of the tiles. Medium-bed mortars provide better support and help in preventing lippage, which is essential for ensuring a smooth and even tiled surface (Stone World).
| Tile Type | Typical Size (inches) | Weight Considerations |
|---|---|---|
| Wall Tiles | 12 x 12 to 24 x 24 | Requires medium-bed mortar |
| Stone Panels | Up to 7 feet long and 4 feet wide | Requires additional support |
Surface and Substrate Preparation
Proper surface and substrate preparation are vital for the successful installation of large format tiles. Due to the size and weight, there are tighter tolerances needed for the substrate. Uneven surfaces can lead to problems like lippage and poor adhesion, compromising the longevity and aesthetic of the tile installation.
- Surface Flatness: Ensure that the surface where the tiles will be laid is flat and even. Any irregularities should be addressed before starting the tile installation. Use a suitable leveling compound if needed.
- Substrate Strength: The underlying substrate must be strong enough to support the weight of the large format tiles. Check for any structural weaknesses and reinforce them as necessary.
- Clean and Dry Surface: The surface should be clean, dry, and free from any contaminants that could affect the bonding of the tiles. Dust, oils, and debris should be thoroughly removed.
Medium-bed mortars can help accommodate minor surface variations and ensure better adhesion and support for the large format tiles. Additionally, avoiding patterns with offsets in excess of 33% can reduce the risk of visible lippage.
Explore more about adhesive tile mat and adhesive drywall tape for effective tile and wall installations. Understanding how to get adhesive and maintain its integrity ensures the durability of your tile projects.
Choosing the Right Mortar for Large Format Tiles
Selecting the appropriate mortar is crucial for the successful installation of large-format tiles. This section covers popular options like Mapei Ultraflex LFT White Mortar and medium-bed mortar recommendations.
Mapei Ultraflex LFT White Mortar
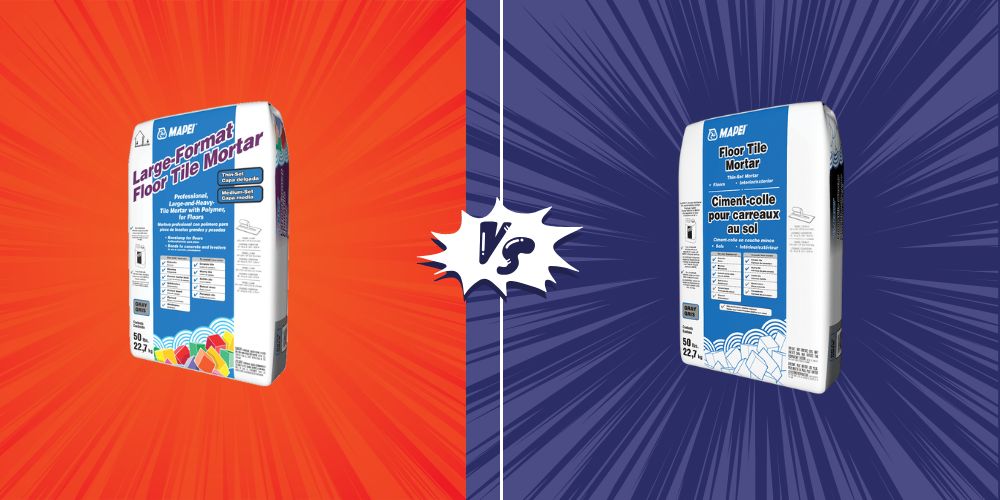
Mapei Ultraflex LFT White Large Format Tile Mortar is a premium choice specifically designed for large and heavy tiles. This nonsag, large-and-heavy-tile mortar and thin-set mortar is suitable for both interior and exterior floor, wall, and countertop installations.
Key Features:
- High Dry Polymer Content: Ensures excellent adhesion to the substrate and tile.
- Easy Glide Technology: Facilitates ease of application.
- Nonsag Formula: Prevents the tiles from slipping during installation.
- Multi-Purpose: Suitable for both floors and walls.
| Attribute | Specification |
|---|---|
| Bag Weight | 50 lb |
| Application | Interior/Exterior |
| Surfaces | Floor, Wall, Countertop |
| Technology | Easy Glide |
For more information, visit the product page on Floor and Decor.
Medium-Bed Mortar Recommendations
Medium-bed mortars are well-suited for large format tiles as they resist shrinkage, provide a sturdy bond, and compensate for irregularities in the tile and substrate. Unlike thinset mortars, medium-bed mortars can handle heavier and larger tiles without sagging or slipping.
Key Considerations:
- Shrinkage Resistance: Ensures tiles stay in place.
- Strong Bond: Secures the tile to the substrate effectively.
- Compensation for Irregularities: Adjusts for any unevenness in the tile or the installation surface.
| Attribute | Specification |
|---|---|
| Shrinkage | Resistant |
| Bond Strength | High |
| Application | Large Format Tiles |
Application Tips
- Proper Application: Avoid swirling the mortar during application to prevent trapped air and voids, which can lead to cracked tiles and bond failure.
- Backbuttering: Essential for large format tiles to ensure even mortar coverage, particularly recommended for glass tile, natural stone, or exterior surfaces (Tile Outlets).
For additional guidance on choosing the right mortar for your project, consider browsing our articles on adhesive tile mat and understanding advantages and disadvantages of different adhesion options.
Challenges and Solutions in Large Format Tile Installations
Installing large-format tiles presents unique challenges such as managing lippage and ensuring substrate flatness. These factors are critical to achieving a professional-looking installation. Below are the key issues and potential solutions.
Managing Lippage in Installation
Lippage occurs when tiles are not level with each other, creating an uneven surface. This can be particularly problematic with large-format tiles due to their size and the difficulty in ensuring flatness. According to Stone World, the weight of large tiles can contribute to this issue.
Solutions for Managing Lippage:
- Use a larger notch trowel and medium bed or full contact mortar as recommended by the Crossville Tile Memo.
- Employ non-sag thinset mortars and mastics to maintain the placement of tiles (Stone World).
- Implement a wider grout joint, particularly if the grout joint is desired to be less than 1/8 of an inch.
Table: Grout Joint Recommendations
| Tile Type | Recommended Grout Joint Width |
|---|---|
| Large Format Tile | 1/8 inch or wider |
| Rectangular Tile (Offset Pattern) | Up to 3/16 inch |
Addressing Substrate Flatness
A flat substrate is crucial for large-format tile installations. Any imperfections in the surface can result in uneven tiles and, consequently, lippage. The Marble Institute of America standards emphasize the importance of substrate preparation.
Solutions for Ensuring Substrate Flatness:
- Properly prepare the surface and substrate by removing any debris and leveling the area (Stone World).
- Utilize floor leveling compounds or underlayment to achieve a flat surface.
- Regularly check the flatness of the substrate using a straightedge or level.
Lighting Impact on Lippage Visibility:
- Adjust artificial lighting to move sources away from the wall.
- Align patterns so that offsets are not perpendicular to the direction of natural light, particularly in late afternoon or early morning (Tile Outlets).
For more information about adhesives and related products, check out our articles on adhesive tile mat and advantages and disadvantages.
By understanding these challenges and implementing the necessary solutions, installers can ensure a smooth, professional finish for large-format tile projects.
Best Practices for Large Format Tile Projects
When installing large format tiles, attention to detail is essential for achieving the best results. Following best practices ensures a successful installation and long-lasting durability.
Grout Joint Considerations
One of the aesthetic benefits of using large format tiles is the reduction of grout lines, creating a seamless and expansive appearance (Tile Club). However, when it comes to grout joints, certain considerations must be taken into account to manage lippage and ensure stability.
The Tile Council of North America recommends that for tiles with any side 18 inches or longer, the grout joint shall be, on average, a minimum of 1/8 inch wide for rectified tiles and a minimum of 3/16 inch wide for calibrated (non-rectified) tiles (Tile Outlets). This standard helps in managing lippage during installation, which can be a common issue with large tiles.
| Tile Type | Minimum Grout Joint Width |
|---|---|
| Rectified Tiles | 1/8 inch |
| Calibrated (Non-Rectified) Tiles | 3/16 inch |
For a clean and unified look, ensure the grout color closely matches the tile color. This not only enhances the seamless appearance but also requires less maintenance due to fewer visible grout lines.
Lighting Impact on Lippage Visibility
Lighting plays a significant role in how lippage is perceived in large format tile installations. Poor lighting can emphasize any inconsistencies or slight height variations between the tiles. It’s crucial to consider the light sources and their positions during planning and installation.
Natural light and artificial lighting from various angles can cast shadows that highlight lippage. Therefore, installing appropriate lighting that provides even illumination can minimize these shadows and reduce the visibility of any lippage issues. This consideration is vital for creating a sleek and polished look.
For more detailed techniques and tools on overcoming these challenges, check out our guide on managing lippage in installation.
By adhering to these best practices, you can ensure a flawless and durable large format tile installation that enhances the aesthetic appeal and functionality of the space. For more in-depth information about adhesives and related topics, visit our sections on adhesive drywall tape and adhesive tile mat.

