Adhesive Drywall Tape vs Paper

Adhesive Drywall Tape vs Paper: Pro Tips

Understanding Adhesive Drywall Tape

Drywall tape is an essential component in the process of finishing drywall. It serves to reinforce and stabilize joints between sheets, ensuring a seamless and durable finish.

Purpose of Drywall Tape

Adhesive drywall tape creates a physical bond between adjacent sheets of drywall, reducing movement and potential cracking (DIY Stack Exchange). This bond does not significantly contribute to the overall structural support of the drywall sheets.
Two primary purposes of drywall tape include:

  • Bridging Gaps: It helps to bridge gaps and prevent cracks along the joint lines.
  • Reinforcing Joints: It reinforces joints and prevents the joint compound from shrinking and cracking as it dries, ensuring that the seams remain invisible.
Purpose Benefits
Bridging Gaps Prevents cracks along joint lines
Reinforcing Joints Ensures invisible seams and prevents shrinkage

Drywall tape is crucial because joint compound alone is insufficient for creating invisible seams. The compound tends to shrink, but tape does not, which is why tape is indispensable for achieving a smooth, seamless finish (DIY Stack Exchange).

Types of Adhesive Tapes

There are several types of adhesive drywall tapes available, designed for different applications and finishes. Understanding the various types will help in selecting the best option for your specific needs.

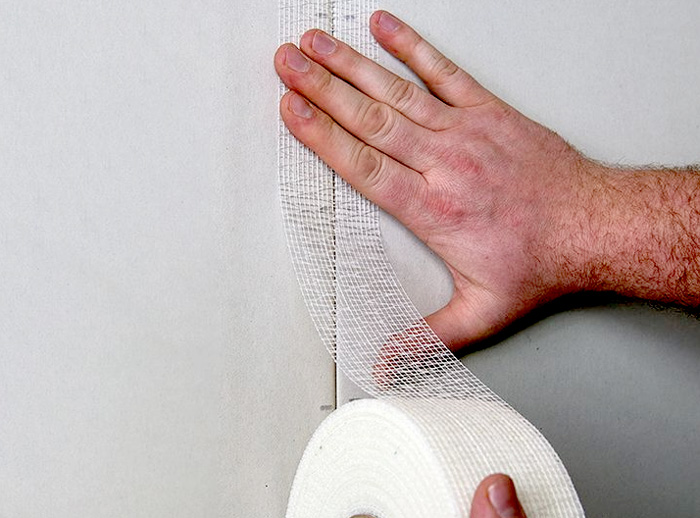
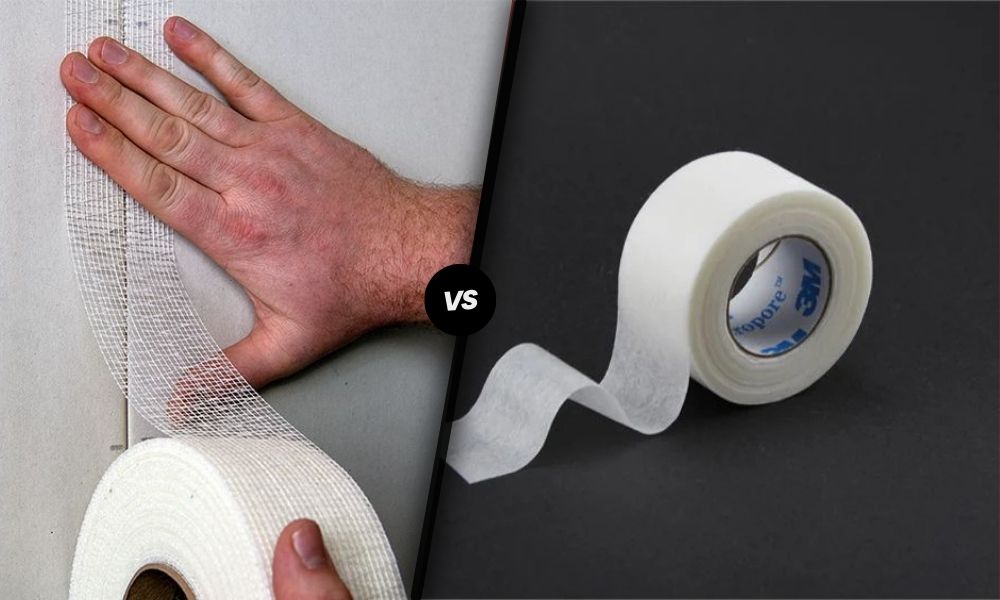
  1. Fiberglass Mesh Tape: A popular choice due to its self-adhesive properties and ease of use. The mesh structure provides excellent reinforcement and is ideal for both novice and experienced drywall installers.
  2. Paper Tape: Traditional paper tape requires embedding in a layer of joint compound and offers strong adhesion and flexibility, making it suitable for a variety of drywall applications.
  3. Ultra-Thin Drywall Tape: This type is known for creating minimal buildup, which is particularly useful in achieving a smooth finish in tight or detailed areas.
Type of Tape Features
Fiberglass Mesh Tape Self-adhesive, easy to use, excellent reinforcement
Paper Tape Requires embedding, strong adhesion, flexible
Ultra-Thin Tape Minimal buildup, smooth finish

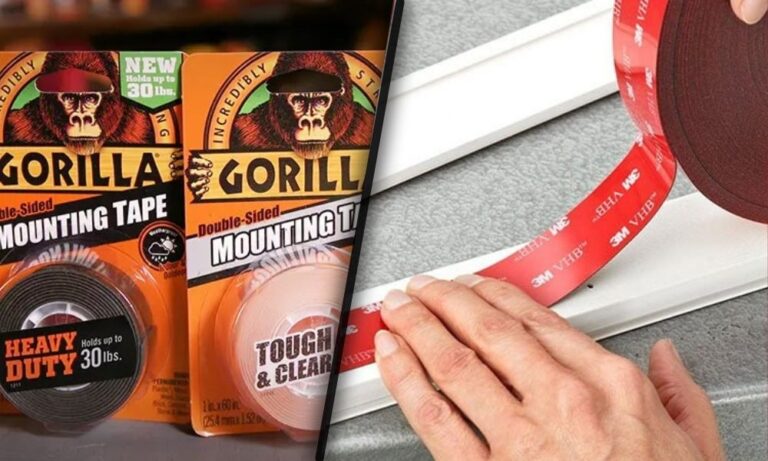
Choosing the right type of tape is essential for the successful completion of a drywall project. Factors such as the specific requirements of the job and the level of experience of the installer should be considered. For more detailed information on adhesive products, explore our articles on gorilla double-sided tape, 3m super strength, and how to use alien tape.

Self-Adhesive Drywall Tape Options

Selecting the right self-adhesive drywall tape can significantly impact the quality and durability of your drywall repairs. This section will discuss the features and benefits of two popular self-adhesive drywall tapes: FibaTape Mesh Joint Tape and Extra Strength Drywall Tape.

FibaTape Mesh Joint Tape

The FibaTape Mesh Joint Tape is a widely-used self-adhesive solution that offers excellent performance for drywall repairs and joint sealing. This tape is made from a durable mesh material that provides added strength and flexibility, making it ideal for a variety of applications.

Feature FibaTape Mesh Joint Tape
Material Mesh
Self-Adhesive Yes
Tape Width 2-3/8 inches
Tape Length 150 – 500 feet
Availability The Paint Store, Home Depot

Advantages:

  • Self-adhesive for ease of use
  • Provides excellent strength and flexibility
  • Available in multiple lengths to suit different project sizes

The FibaTape Mesh Joint Tape is an excellent choice for those looking for a reliable and easy-to-use adhesive drywall tape option. However, it can be more challenging to use on inside corners due to the absence of a crease, requiring additional care.

Extra Strength Drywall Tape

The FibaTape Extra Strength Drywall Tape offers additional robustness for more demanding drywall repairs and joint finishing tasks. This tape is designed to handle heavier loads and provide greater durability compared to standard mesh tapes (The Paint Store).

Feature Extra Strength Drywall Tape
Material Extra-strong Mesh
Self-Adhesive Yes
Tape Width 2-3/8 inches
Tape Length 250 feet
Availability The Paint Store, Home Depot

Advantages:

  • Extra strength for more demanding applications
  • Self-adhesive for simple application
  • Ideal for heavy-duty repairs and joint finishing

The Extra Strength Drywall Tape is perfect for more extensive repairs and high-stress areas, ensuring that joints remain secure and damage-free over time. For more information about choosing the right adhesive for your project, check out our articles on advantages and disadvantages and how to get adhesive.

By understanding the features and benefits of these self-adhesive drywall tape options, you can make an informed decision on the best product for your specific needs. Whether you choose the standard FibaTape Mesh Joint Tape or the Extra Strength Drywall Tape, both options offer reliable and easy-to-use solutions for your drywall projects. For additional tips and techniques on application, refer to our section on how to use alien tape.

Choosing the Right Drywall Tape

Choosing the suitable drywall tape can significantly impact the quality and durability of your project. This section provides key factors to consider and highlights the benefits of mesh tape.

Factors to Consider

Various factors should be considered when selecting the appropriate drywall tape:

  1. Material: Drywall tape is available in different materials, such as paper or mesh (fiberglass). Mesh is mold-resistant and suits moist environments like bathrooms (Family Handyman).
  2. Strength and Durability: Paper tape is slightly stronger and versatile, whereas mesh tape offers enhanced durability due to its mold-resistant properties (Family Handyman).
  3. Resistance to Moisture: For moisture-prone areas such as bathrooms, mesh tape is more resilient and effective in preventing mold growth.
  4. Application Requirements: Some projects may require specific tape lengths depending on the size and scope. Available lengths range from 10 ft to 500 ft.
  5. Ease of Use: Self-adhesive drywall tape can simplify the application process, making it easier for DIYers and reducing the chances of mistakes.

Benefits of Mesh Tape

Mesh drywall tape brings unique advantages, especially for those working in moisture-prone environments. It allows the compound to pass through the tape, ensuring a stronger bond to the wallboard (Quora).

Feature Mesh Tape Paper Tape
Mold Resistance High Low
Moisture Suitability Excellent Limited
Strength Moderate High
Versatility Good Excellent
Application Ease Easy (Self-adhesive) Requires skill (Bedding with compound)

In adhesive drywall tape applications, mesh tape ensures a reliable and long-lasting hold. Fiberglass mesh tape is recommended for high-moisture areas like backsplashes and bathrooms due to its resistance to water and mold (Family Handyman).

For additional adhesive solutions, readers can explore 3m weatherstrip adhesive or gorilla double sided tape to complement their drywall taping projects.

Regardless of your choice, always ensure that the tape suits your specific needs and enhances the overall durability and finish of the project.

Application Techniques

Effective application of adhesive drywall tape ensures durability and a seamless finish in drywall installations. Here are the techniques and common pitfalls to avoid.

Applying Self-Adhesive Tape

Applying self-adhesive mesh tape requires a systematic approach to ensure a smooth and strong bond. This type of tape allows mud to pass through it and bond to the wallboard, providing a reliable and lasting hold.

Steps to Apply Self-Adhesive Tape:

  1. Prepare the Surface:
  • Clean the joints and remove any dust or debris to help the adhesive stick better.
  • Ensure the drywall joints are dry.
  1. Measure and Cut:
  • Measure the length of the joint and cut the tape accordingly.
  1. Positioning the Tape:
  • Position the tape over the joint, ensuring it is centered.
  • Press the tape firmly to secure it in place.
  1. Apply the First Coat of Mud:
  • Using a joint knife, apply a thin layer of joint compound over the tape.
  • Press the mud through the mesh to ensure it bonds with the wallboard.
  • Smooth out the compound to avoid lumps.
  1. Additional Coats of Mud:
  • Once the first coat is dry, apply two to three more layers of joint compound, feathering the edges outwards to create a seamless finish.
Step Tool/Material Needed
Surface Preparation Cleaning brush
Measure and Cut Measuring tape, Scissors
Positioning the Tape Self-adhesive mesh tape
Apply the First Coat of Mud Joint knife, Joint compound
Additional Coats Joint knife, Joint compound

For detailed steps and techniques, refer to our internal guide on how to apply self-adhesive tape.

Common Mistakes to Avoid

Proper application of self-adhesive drywall tape is crucial for a durable and visually pleasing result. Here are common mistakes to watch out for:

1. Neglecting Surface Preparation:

  • Not cleaning the drywall joints can result in poor adhesion, leading to tape lifting or bubbling.

2. Incorrect Positioning:

  • Misalignment can cause the tape to fail at hiding seams. Ensure the tape is centered over the joint.

3. Skipping the Bedding Process:

  • Failing to bed the tape with a thin layer of mud can lead to gaps and a weak bond. Always press the tape into the compound.

4. Insufficient Mud Coverage:

  • Applying too little joint compound may not effectively cover the tape, leading to visible seams.

5. Overworking the Joint Compound:

  • Excessive smoothing and reworking can cause air bubbles and an uneven surface. Apply smooth, consistent strokes for the best finish.

6. Ignoring Drying Times:

  • Rushing through drying stages can result in bubbling or cracking of the joint compound. Allow appropriate drying time between coats.

Refer to our internal article on common drywall taping mistakes for a more comprehensive list.

By understanding the right techniques and avoiding common mistakes, you can achieve professional results with adhesive drywall tape. For further insights into the benefits of mesh tape, visit benefits of mesh tape.

Specialized Drywall Tape Tools

When working on drywall projects, having the right tools can make all the difference. Here we explore two essential tools for effective taping and repairing: the MudGun Kit for Small Repairs and proper tool utilization.

MudGun Kit for Small Repairs

The MudGun Kit from Hyde Tools is designed to simplify the process of applying drywall mud. This tool provides controlled speed and precision, which can reduce the mess and hassle typically associated with drywall taping and repairs (Bob Vila).

The MudGun Kit includes:

  • Two specialized embedding nozzles
  • A finishing head
  • A taping knife

These components enable users to achieve professional results with greater accuracy. The embedding nozzles help to embed the tape into the mud smoothly, while the finishing head creates a uniform, ultra-thin finish coat by gently squeezing the trigger and moving the head slowly but firmly over the joint (Bob Vila). This feature makes it perfect for small repair jobs and ensures a seamless finish.

Item Price
MudGun for Small Repairs $87.25
MudPaks (case of six) $4.89

More information and purchasing options are available at HydeStore.com.

Proper Tool Utilization

Proper utilization of tools is crucial for achieving the best results in drywall projects. Below are some key tips for effective use of the MudGun Kit and other drywall taping tools:

  1. Preparation: Ensure the drywall surface is clean and dry before starting. Remove any dust and debris to ensure proper adhesion of the tape and mud.
  2. Consistent Pressure: When using the MudGun, apply consistent pressure while squeezing the trigger to maintain an even flow of mud.
  3. Smooth Movements: Move the finishing head slowly but firmly over the joint to create a smooth, uniform finish coat.
  4. Proper Cleaning: After use, clean all tools thoroughly to prevent mud buildup and ensure longevity.

For more detailed guidelines on drywall taping, visit our article on tips for straightening curly hair.

By understanding the functionality and proper use of specialized drywall tape tools, you can achieve professional-quality results with ease. Whether you’re tackling a small repair project or working on a larger task, the right tools and techniques will help you get the job done efficiently.

Tips for Effective Drywall Taping

Ensuring Proper Installation

Achieving a smooth and professional finish with adhesive drywall tape involves meticulous attention to detail. Here are the key steps to ensure proper tape installation:

  1. Preparation: Clean the drywall surface to remove any dust or debris. This provides a clean base for the tape to adhere properly.
  2. Positioning the Tape: Place the tape evenly over the drywall joints. Self-adhesive drywall tape eliminates the need for joint compound during application, making it less messy and more manageable (Master Building Materials).
  3. Applying the Joint Compound: For mesh tape, a setting-type joint compound adds strength, making it suitable for butt joints (Family Handyman). Apply with a taping knife at a consistent angle to embed the tape firmly into the joint.
  4. Smoothing the Compound: After applying the joint compound, smooth it out using a wider taping knife. Ensure the compound extends past the edges of the tape to create a seamless blend with the drywall.
  5. Finishing: Allow the compound to dry completely, then sand it down to eliminate any rough spots. Repeat the application and sanding process if needed for a perfectly smooth finish.

Troubleshooting Wrinkles and Overlaps

Wrinkles and overlaps can compromise the smooth finish of drywall, causing visible imperfections. Here are tips for troubleshooting these common issues:

  1. Handling Wrinkles:

    • Remove and Reapply: If wrinkles appear during tape application, gently lift the tape and reposition it. Press it firmly into place to eliminate any folds.
    • Additional Smoothing: Use a taping knife to smooth out any minor wrinkles by applying gentle pressure as you go over the tape.
  2. Addressing Overlaps:

    • Proper Alignment: Ensure that the tape is aligned straight over the joints with minimal overlap. Overlapping tape creates uneven surfaces, which can be difficult to smooth out during finishing.
    • Cutting Excess Tape: If overlaps occur, use a utility knife to cut away the excess tape. Smooth the edges with sandpaper to create a flush surface.
Common Issue Solution
Wrinkles in Tape Lift and reposition tape, smooth with a taping knife
Overlapping Tape Ensure proper alignment, cut excess tape with utility knife

By following these tips, individuals can achieve a professional-looking finish when using adhesive drywall tape. For more detailed guidance and tool recommendations, explore our section on specialized drywall tape tools.

Similar Posts