MusselBound vs Thinset: Which Works Better?
MusselBound: An Overview
Introduction to MusselBound
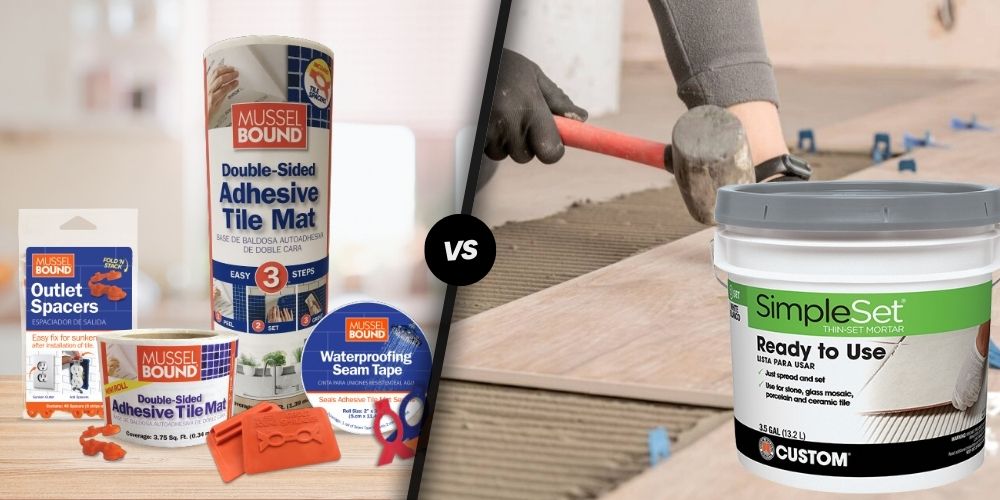
MusselBound is a double-sided adhesive mat specifically designed for tiling projects. It provides an ingenious alternative to traditional thinset mortar, making it an attractive option for DIYers and beginners. The primary goal of MusselBound is to simplify the tiling process, reduce time, and minimize mess, ensuring a smooth and efficient application.
Advantages of MusselBound
MusselBound offers several advantages, making it a popular choice for various tiling applications:
Ease of Use: One of the standout benefits of MusselBound is its user-friendliness. The adhesive mat is designed to be intuitive, greatly reducing the intimidation that often accompanies tiling projects. This makes it especially suitable for beginners and DIY enthusiasts.
Time Efficiency: MusselBound significantly cuts down on the time required for tile installation. Unlike thinset mortar, which involves mixing and curing time, MusselBound provides an instant, adhesive surface ready for tile placement.
Minimal Mess: Traditional mortar can be messy and cumbersome, but MusselBound’s double-sided adhesive mat avoids this issue. This leads to a cleaner workspace and simplifies the overall tiling process.
Versatility: MusselBound is versatile and well-suited for a variety of tiling projects, including backsplashes and other accent walls. Its adaptability to different surfaces enhances its appeal for diverse tiling needs.
Positive User Experience: Users generally report a positive experience with MusselBound, highlighting its ease of use and the successful results it delivers in tile installations.
| Feature | MusselBound | Thinset Mortar |
|---|---|---|
| Ease of Use | Beginner-Friendly | Moderate to Advanced |
| Installation Time | Quick and Efficient | Longer, Requires Curing |
| Mess | Minimal | Moderate to High |
| Suitable Projects | Backsplashes, Walls | Floors, Heavy-Duty Projects |
| User Experience | Positive | Variable |
By understanding the unique features and advantages of MusselBound, one can make an informed decision when comparing MusselBound vs. Thinset for their tiling projects.
MusselBound vs. Thinset: Comparison
Understanding the differences between MusselBound and thinset helps in making an informed decision for tiling projects. Let’s explore the key features and benefits of each.
MusselBound Features
MusselBound is a double-sided adhesive mat designed for tiling projects, offering a modern alternative to thinset mortar. Here are the main features of MusselBound:
- Ease of Use: MusselBound simplifies the tiling process, making it less intimidating for DIYers. The adhesive mat provides a user-friendly installation process.
- Quick Installation: MusselBound enables faster installation compared to traditional thinset. This is ideal for projects requiring quick turnaround.
- Clean and Mess-Free: Unlike thinset, MusselBound does not involve mixing or mess, providing a cleaner and more organized workspace.
- Flexibility: MusselBound is suitable for projects that may take longer to complete or require intermittent work, providing flexibility for DIYers.
Benefits of Thinset
Thinset mortar, a traditional adhesive used for tiling, is well-regarded for its strength and versatility. Here are the benefits of using thinset:
- Strong Adhesion: Thinset provides a strong and durable bond between tiles and surfaces, ensuring long-lasting adhesion.
- Versatility: Thinset can be used on a wide range of surfaces and with various types of tiles, including ceramic, porcelain, and natural stone.
- Cost-Effective: Thinset is often more affordable than modern adhesive mats like MusselBound, making it a budget-friendly option for large projects.
- Proven Performance: Thinset has a long track record of successful use in both residential and commercial tiling projects, offering proven reliability.
| Feature | MusselBound | Thinset |
|---|---|---|
| Ease of Use | High | Moderate |
| Installation Time | Quick | Longer |
| Cleanliness | Mess-Free | Can be messy |
| Flexibility | High | Less flexible |
| Adhesion Strength | Moderate | High |
| Cost | Moderate | Lower |
Choosing between MusselBound and thinset largely depends on the specific requirements of the tiling project and personal preferences. For more details on using different adhesives, explore musselbound vs. mortar.
Using MusselBound for Tiling
When considering alternatives to traditional thinset mortar for tiling, MusselBound Adhesive Tile Mat presents a viable option. This section explores the application process and suitable tiling projects when using MusselBound.
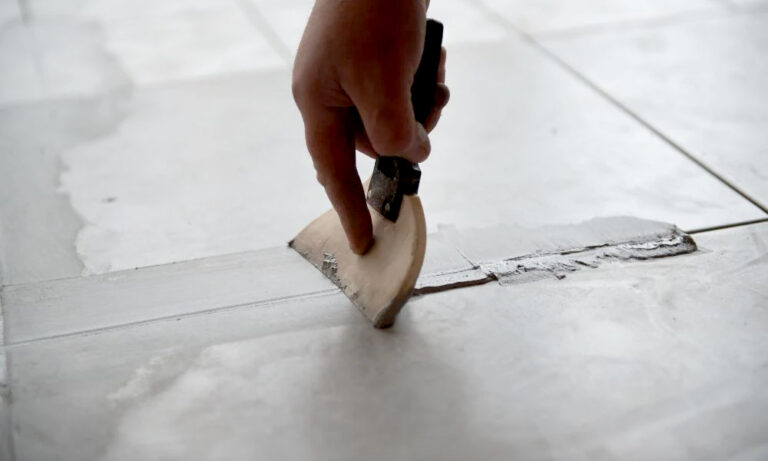
Application Process
Applying MusselBound for tiling is straightforward and beginner-friendly. Here are the steps:
- Prepare the Surface: Ensure that the wall surface is clean, dry, and free from dust or grease.
- Cut the Mat to Size: Use scissors to cut the MusselBound mat to the desired size.
- Remove Paper Backing: Peel off the paper backing from one side of the mat.
- Apply MusselBound to Wall: Press the sticky side of the mat onto the wall. Use a tile float to ensure proper adhesion by pressing firmly against the mat.
- Remove Top Layer Backing: Once the mat is securely in place, peel off the top layer paper backing.
- Place Tiles: Stick the dry tiles onto the exposed adhesive surface of the mat. Ensure that the tiles are dry, as wet or damp tiles will not adhere properly (Average Inspired).
- Grout the Tiles: After all the tiles are in place, grout as required to complete the project.
Suitable Tiling Projects
MusselBound is particularly suitable for small to medium tiling projects, making it a great choice for areas where traditional thinset mortar might be too cumbersome or messy.
| Tiling Project | Suitable for MusselBound? |
|---|---|
| Kitchen Backsplash | Yes |
| Bathroom Backsplash | Yes |
| Shower Walls | Yes |
| Full Bathroom Walls | No |
| Outdoor Projects | No |
For specific applications, MusselBound excels in projects such as:
- Kitchen Backsplashes: It simplifies the process and reduces mess, making it an ideal choice for this commonly tiled area.
- Bathroom Backsplashes: The adhesive mat makes wall tiling quick and efficient, suitable for DIY enthusiasts.
- Laundry Rooms: MusselBound’s ease of use makes it a practical option for adding a stylish touch to laundry room walls.
For more on musselbound vs. thinset, the advantages, and how MusselBound compares to other adhesives, see our full article. Additionally, consider pairing your project with a heat protectant for hair straightening to ensure a completely smooth finish.
MusselBound Application Guidelines
Compatible Surfaces
MusselBound can be adhered to a variety of surfaces, making it highly versatile for different tiling projects. Here is a breakdown of compatible surfaces:
| Surface Type | Compatibility |
|---|---|
| Painted or Primed Drywall | Yes |
| Cement Board | Yes |
| Stainless Steel | Yes |
| Glass | Yes |
| Fiberglass | Yes |
| Plywood | Yes |
| Wallpaper | Yes |
| Paneling | Yes |
| Laminate | Yes |
| Existing Tile | Yes |
| KERDI® Board by Schluter | No |
| GoBoard® by Manville (if not primed) | No |
| Dusty/Chalky Surfaces (e.g., Hardie® Backer Board) | No |
| Unpainted/Unprimed Wallboard or Spackle/Patching Compound | No |
Additional details on compatible substrates can be found on MusselBound FAQ.
MusselBound works well with uniform-backed glass, stone, porcelain, ceramic, metal, or mesh-backed mosaics that are 1 square foot or smaller and less than ½ inch thick. It is not compatible with paper-faced tiles.
When using MusselBound on patched or spackled areas, ensure these surfaces are coated with paint or primer to eliminate the dusty top layer and ensure proper adhesion. The adhesive’s pressure-sensitive nature requires surfaces to be clean, thoroughly dry, and given a firm press to activate adhesion.
Avoiding Common Mistakes
To achieve optimal results when using MusselBound, it is essential to avoid common mistakes. Here are a few guidelines:
- Clean Surfaces: Ensure surfaces are free from grease, moisture, and dust. Any residual impurities can hinder the adhesive’s capability.
- Dry Thoroughly: Any moisture on the surface will compromise the adhesive’s effectiveness.
- Firm Press: Apply a firm press to activate the pressure-sensitive adhesive. This is crucial for strong and lasting adhesion.
- Avoid Incompatible Surfaces: Do not use MusselBound on KERDI® board by Schluter, unprimed GoBoard® by Manville, or similar unsuitable surfaces mentioned above.
- Patch and Paint: Always coat spackled or patched zones with primer or paint to ensure the adhesive sticks properly.
- Proper Surface Preparation: For surfaces that require preparation, use suitable primers to create a solid base for the adhesive.
For more on tiling adhesives and their applications, consider exploring articles on types of cement adhesive.
By following these application guidelines and avoiding common pitfalls, users can ensure a successful tiling project using MusselBound. For additional recommendations and practical uses, check our section on jb weld plastic bonder.
User Experiences with MusselBound
DIYer Feedback
MusselBound has garnered positive feedback from DIY enthusiasts for its ease of use and efficiency in tile installations. Many users appreciate its simplicity, making tiling projects more approachable, especially for those with limited experience.
One user shared their pleasant experience with MusselBound during a subway tile backsplash project in their kitchen. They highlighted how the sticky tile adhesive mat eliminates the need for traditional tools like a wet tile saw and trowel, which are typically required for thinset applications.
Key points from DIYer feedback:
- Ease of Use: MusselBound is described as beginner-friendly due to its straightforward application process.
- Time-Saving: Users appreciate the time saved by avoiding the mixing and application of thinset.
- Minimal Tools Required: Users can complete tiling projects without the extensive tool kit usually needed for thinset.
Longevity and Durability
User experiences indicate that MusselBound holds up admirably over time. One particular user reported impressive durability, noting that their kitchen backsplash remained solid and intact after two years with no cracking, peeling, or loose spots. This suggests that MusselBound can be a reliable choice for long-term tiling projects.
In addition to user satisfaction with the product’s performance over time, MusselBound has also been credited for its aesthetic longevity. Users found that their tiled surfaces looked as good as new even after extended periods, indicating a lasting visual appeal.
Key points on longevity and durability:
- Long-Term Performance: MusselBound has shown to maintain its adherence over years.
- Durability: Tiles remain firmly in place with no visible wear and tear.
- Aesthetic Maintenance: Users reported that their tiling projects continued to look professional and intact.
Below is a summary table reflecting user feedback on its longevity:
| Aspect | Feedback |
|---|---|
| Time Since Application | 2 years |
| Wear and Tear | No cracking, peeling, or loose tiles |
| Appearance | Remained visually appealing and intact |
For more comparisons with other adhesive products, such as the Loctite vs. Permatex debate, check out our related articles.
MusselBound also excels in ease of installation, leading to consistent success among DIY users. For additional tips and product comparisons, such as liquid nails vs. loctite, peruse our other guides.
MusselBound: Final Recommendations
Practical Uses
MusselBound Adhesive Tile Mat is highly recommended for several specific applications. It is particularly suitable for beginners, individuals looking to multitask during projects, and those interested in completing small tiling projects efficiently and with less mess compared to traditional methods like thinset mortar. Some common uses include:
- Kitchen backsplashes
- Bathroom walls
- Subway tiles
- Mosaic tile projects
This product is also beneficial for tiling projects that may span across several days, providing the ability to work on the project intermittently without the immediate cleanup traditionally associated with mortar Shoe Makes New).
Pros and Cons
Understanding the benefits and limitations of MusselBound can help determine whether this adhesive mat is suitable for your needs. Here is a detailed table summarizing its advantages and disadvantages:
| Pros | Cons |
|---|---|
| Ease of Use: User-friendly for beginners. | Grouting Limitation: Recommended to grout within 24 hours. |
| Clean Application: Minimizes mess compared to traditional thinset | Cost: Generally more expensive than traditional mortar. |
| Flexibility: Ideal for projects requiring intermittent work. | Limited Heavy Duty Applications: May not be suitable for heavy or floor tiles. |
| No Special Tools Required: Eliminates the need for a wet tile saw and trowel. | Surface Compatibility: Works best on clean, flat surfaces (Average Inspired). |
| Durability: Proves durable and reliable over years. | – |
For more detailed experiences from users, check out our section on user experiences with MusselBound. Additionally, review our complete guide on musselbound vs. thinset to make an informed decision for your next tiling project.