Is JB Weld Sandable? Surface Finishing Tips
Understanding Sanding JB Weld
Sanding JB Weld can help achieve a smooth and professional finish, but it requires the right techniques and equipment to avoid damaging the bond or the surrounding surface.
Equipments for Sanding
To sand JB Weld effectively, you will need the following:
- Sandpaper: Start with coarse grit (100-120) and gradually move to a finer grit (400-600) for smoothing.
- Sanding Block: Helps to apply even pressure and maintain a level surface.
- Wet/Dry Sandpaper: Particularly useful for wet sanding, which can minimize dust and heat buildup.
- Dust Mask: Always wear a dust mask to protect yourself from inhaling fine particles.
| Equipment | Purpose |
|---|---|
| Sandpaper | Initial sanding and fine smoothing |
| Sanding Block | Even pressure application |
| Wet/Dry Sandpaper | Wet sanding for less dust and heat |
| Dust Mask | Personal safety during sanding |
Curing Time Before Sanding
For optimal results, it’s crucial to allow JB Weld to cure fully before attempting to sand it. According to Arc Welding Fabrication, JB Weld typically takes about 4-6 hours to set at room temperature (around 25°C or 77°F) and 15-24 hours to fully cure.
| Stage | Time Required |
|---|---|
| Initial Set | 4-6 hours |
| Full Cure | 15-24 hours |
Once fully cured, JB Weld can be sanded to shape or smooth the surface as necessary (Arc Welding Fabrication). It’s recommended to wait at least 8 hours for optimal durability and results.
For additional information, visit our articles on is jb weld gas resistant and is jb weld heat resistant to learn more about the properties and applications of JB Weld.
Sanding Techniques for JB Weld
Initial Sanding Steps
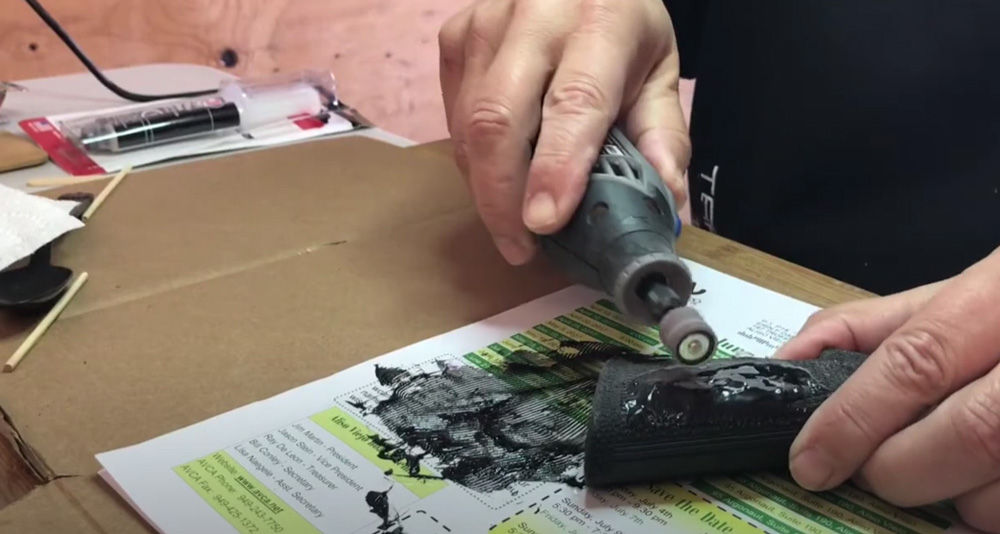
Sanding JB Weld is an essential step before painting, as it ensures a smooth, uniform surface and better paint adhesion. Here are the initial steps for sanding JB Weld:
- Cure Time: Ensure the JB Weld has fully cured. It typically takes about 4-6 hours to set and 15-24 hours to fully cure (Arc Welding Fabrication).
- Coarse Sandpaper: Start with a coarse sandpaper like 80 or 120 grit to remove any excess material and to shape the surface.
- Reduce Pressure: Apply moderate pressure to avoid damaging the JB Weld or the surrounding area (Arc Welding Fabrication).
- Check Progress: Regularly check the progress to ensure you don’t oversand, which might weaken the bond or affect the final finish.
Fine Sanding for Smoothing
Once the initial sanding is completed, follow these steps for fine sanding to smooth out the surface:
- Medium Grit: Move on to a medium grit sandpaper (220 grit). This will help to smooth out the earlier sanding marks (Arc Welding Fabrication).
- Fine Grit: Gradually use finer grit sandpapers, such as 320 and then 400 grit, to achieve a smoother finish.
- Uniform Surface: Sand evenly across the surface for a uniform finish. This helps in creating a level surface, especially important if you plan to paint over the JB Weld (Weldit).
- Inspection: Use your fingers to feel the surface for any imperfections. Sand further if required.
Wet Sanding Benefits
Wet sanding is highly beneficial for achieving a professional finish on JB Weld. Here is why wet sanding can be advantageous:
- Prevents Clogging: Using water or lubricant during sanding prevents clogging of the sandpaper, enabling it to cut more efficiently for a longer period (Arc Welding Fabrication).
- Reduces Heat: Wet sanding helps in reducing heat and friction, which can otherwise damage both the sandpaper and the JB Weld adhesive (Arc Welding Fabrication).
- Fine Finish: It helps in achieving a much finer and smoother finish compared to dry sanding.
- Dust Control: Wet sanding minimizes dust, making the process cleaner and safer.
| Sandpaper Grit | Usage |
|---|---|
| 80 – 120 | Initial shaping and excess removal |
| 220 | Medium smoothing |
| 320 – 400 | Fine smoothing |
By following these sanding techniques, you can achieve a smooth and professional finish on JB Weld. For more detailed information on the curing time and properties of JB Weld, visit our internal links on is jb weld paintable and is jb weld heat resistant.
JB Weld Products & Applications
Versatility of JB Weld
JB Weld is well-known for its versatility and effectiveness across a variety of materials. It can successfully bond metal, glass, porcelain, wood, and most plastics. This makes it ideal for fixing cracks, leaks, and holes, as well as joining different materials together. Whether working on automotive repairs, household fixes, or crafting projects, JB Weld offers a reliable solution.
Types of JB Weld Products
Various JB Weld products are designed to cater to specific needs, providing a comprehensive range for different applications. Here’s a look at some popular JB Weld products and their functions:
| Product Name | Description |
|---|---|
| JB Weld Original | A versatile, two-component epoxy that creates a strong, lasting bond on multiple surfaces. |
| JB Weld Steel Stick | A hand-mixable, steel-reinforced epoxy putty that quickly repairs or rebuilds anything made of metal. |
| JB Weld Epoxy Putty | A moldable, steel-reinforced epoxy that fills holes and projects in a variety of materials. |
| JB Weld Plastic Bonder | A quick-setting, two-part adhesive that bonds plastic to metal and other surfaces (Welding For Less). |
Explore these various products to find the most suitable JB Weld for your project needs. For more detailed comparisons and uses of adhesive products, check our pages on is jb weld fuel resistant, is jb weld gas resistant, and is jb weld paintable.
Tips for a Professional Finish
Sanding Safety Gear
Sanding JB Weld can generate fine particles that may be harmful if inhaled or if they come into contact with the skin or eyes. It is essential to wear appropriate safety gear to protect oneself during the sanding process. The recommended safety gear includes:
- Gloves: To protect your hands from abrasions and harmful particles.
- Dust Mask: To prevent inhalation of fine particles.
- Safety Goggles: To shield your eyes from dust and debris.
Wearing the right gear ensures safety and allows for a more efficient and comfortable sanding experience (Stickyn).
Applying Additional Layers
Achieving a smooth, professional finish often requires multiple layers of JB Weld. After sanding the initial layer, additional layers can be applied to fill in any gaps or imperfections. This process helps to create an even surface that is ready for painting or further finishing.
Steps to Apply Additional Layers:
- Clean the Surface: Before applying a new layer, ensure the surface is free of dust and debris from sanding.
- Mix JB Weld Properly: Follow the manufacturer’s instructions to achieve the correct consistency.
- Apply Evenly: Use a spreading tool to apply the JB Weld evenly across the sanded area.
- Allow to Cure: Let the new layer cure completely before proceeding with sanding or painting.
Applying multiple layers and sanding in between each application creates a strong, uniform surface ideal for painting and achieving a professional finish (Stickyn).
For further information on the applications and properties of JB Weld, check out our articles on is jb weld paintable and is jb weld waterproof. Additionally, explore our guide on is jb weld heat resistant for information on heat resistance.
JB Weld Properties
Understanding the properties of JB Weld is crucial for anyone planning to use it for repairs or other applications. Two important attributes are its heat and chemical resistance, and suitable heating temperatures.
Heat and Chemical Resistance
JB Weld is renowned for its impressive heat resistance and durability under harsh conditions. It can withstand temperatures up to 550 degrees Fahrenheit, making it suitable for applications that involve high heat, such as chamber repairs and filling burn-outs (DadsPipes). This makes JB Weld an excellent choice for automotive and industrial repairs where high temperatures are a factor.
| JB Weld Product | Maximum Temperature (°F) | Chemical Resistance |
|---|---|---|
| Original JB Weld | 550 | High |
| JB Kwik | 300 | Moderate |
JB Weld’s chemical resistance is another key benefit. It is resistant to various chemicals, including gasoline, diesel, hydraulic fluids, and other harmful substances, making it ideal for a wide range of challenging environments.
For more information on JB Weld’s resistance to specific substances, explore our articles on is JB Weld gas resistant and is JB Weld fuel resistant.
Suitable Heating Temperatures
Different JB Weld products have varying heat tolerances, which can determine their suitability for certain projects. The original JB Weld can tolerate temperatures up to 550 degrees Fahrenheit after completely drying. This high heat tolerance ensures that repairs made with JB Weld remain durable and intact under extreme heat conditions.
In contrast, JB Kwik is a faster-setting variant, able to set in 15 minutes and cure in a few hours. However, it has a lower heat tolerance, maxing out at 300 degrees Fahrenheit (DadsPipes). Despite this, JB Kwik is still suitable for many repairs, particularly those that do not encounter extraordinarily high temperatures.
When selecting the appropriate JB Weld product, it’s essential to consider the maximum temperature your project may be exposed to. To explore more about the heat resistance of JB Weld, you can read our detailed articles on is JB Weld heat resistant and is JB Weld waterproof.
Knowing the properties of JB Weld, like its heat and chemical resistance and suitable heating temperatures, will aid in choosing the right type and applying it effectively in your repairs and projects.
Enhancing JB Weld Finish
Polishing After Sanding
After sanding JB Weld, polishing is the next step to achieve a smooth and professional finish. Polishing helps to remove any micro-scratches and enhances the shine of the surface. Using a polishing compound can significantly improve the aesthetics of the bond.
To polish JB Weld:
- Select a polishing compound suitable for metal surfaces.
- Apply a small amount of the compound to a clean, soft cloth.
- Rub the compound onto the sanded JB Weld surface in circular motions.
- Continue polishing until the desired level of shine is achieved.
- Wipe away any excess compound with a clean cloth.
The polishing process not only improves the appearance but also adds a layer of protection to the JB Weld surface. This step is particularly useful if the JB Weld is exposed or part of a visible repair.
Creating a Smooth Surface
Creating a smooth surface with JB Weld involves meticulous sanding and polishing techniques. Following the curing time, start with initial sanding, progress to fine sanding, and finally polish the surface for the best results.
To create a smooth surface:
- Use the Right Sandpaper Grits: Begin with coarse sandpaper (e.g., 80-grit) to remove excessive material. Gradually move to finer grits (e.g., 220-grit and 400-grit) to smooth the surface.
- Apply Wet Sanding: Wet sanding can further enhance the smoothness by reducing dust and lubricating the surface during sanding. Use water with finer grit sandpaper (e.g., 600-grit) to achieve a glass-like finish.
- Inspect the Surface: Regularly check the surface for evenness and smoothness. Ensure there are no visible scratches or uneven spots.
- Apply Additional Layers if Needed: If the surface is not smooth enough after initial sanding, apply another layer of JB Weld and repeat the sanding process. For detailed guidance, refer to our article on is jb weld paintable.
| Sandpaper Grit | Usage |
|---|---|
| 80-grit | Initial sanding to remove excess material |
| 220-grit | Intermediate sanding for smoothing |
| 400-grit | Fine sanding before polishing |
| 600-grit (wet sanding) | Final smoothing for a glass-like finish |
By following these steps and techniques, JB Weld can be sanded and polished to achieve a professional, smooth finish. For additional information on handling and enhancing adhesives, you might find our articles on construction adhesive vs. epoxy and is jb weld heat resistant helpful.
