How To Use Slime Rubber Cement: Application Guide
Understanding Rubber Cement
Introduction to Rubber Cement
Rubber cement is a versatile adhesive commonly used in a variety of applications, from crafting to tire repair. It is designed to provide a reliable and flexible bond, making it an ideal choice for materials that require a strong yet pliable adhesive.
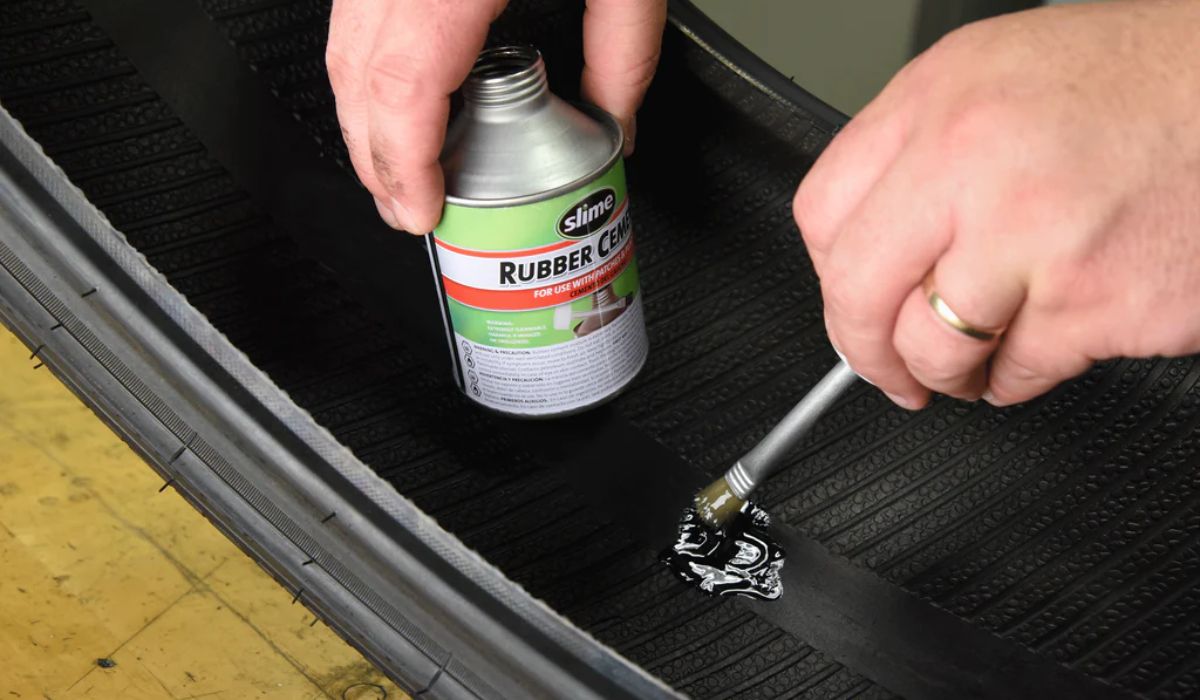
Rubber cement by Slime is specifically formulated to ensure a complete seal on tire repairs. This adhesive is applied by squeezing it onto a rough surface around the puncture and then applying a patch. The result is a dependable and long-lasting repair, essential for maintaining the integrity of tires (Slime).
Key Features of Rubber Cement:
- Quick-Evaporating Solvent: The solvent in rubber cement evaporates rapidly, allowing for a speedy application process. This quick evaporation is critical, especially in tire repair, where continuous work is required to ensure a secure seal at the plug (Quora).
- Vulcanizing Effect: The adhesive has a vulcanizing effect that facilitates an immediate bond, enabling the tire to be inflated right after inserting and trimming the plug (Quora).
- Flexibility and Durability: Rubber cement remains flexible after drying, which is especially beneficial for materials that need to bend or stretch without losing adhesion.
Popular Uses of Rubber Cement:
- Crafting and Scrapbooking: Rubber cement is favored in crafting due to its ability to create repositionable bonds. This allows for adjustments before the glue dries.
- Tire Repair: It is an essential component for patching punctures in various types of tires, including bike tires and automotive tires. The product is praised for its functionality and efficacy in ensuring lasting repairs (Amazon).
For detailed guidelines on how to use Slime’s rubber cement effectively, including a step-by-step tire repair process, refer to the Slime Rubber Cement Instruction Manual. Additionally, explore our internal guides on how long does rubber cement take to dry for more in-depth information on the drying process and how to use e6000 glue on fabric for similar application techniques.
Slime’s Rubber Cement Products
Slime offers versatile rubber cement options, tailored for various tire repair needs. Understanding the features and benefits of these products can help users make an informed decision.
Features of 1 oz Rubber Cement
Slime’s 1 oz rubber cement is compact and user-friendly. This product is specially designed for quick, on-the-go tire repair, making it ideal for emergencies.
- Size: 1 oz tube
- Application: The tube design allows easy squeezing onto a rough surface around the puncture.
- Use Case: Best for small repairs, such as bike tires or small vehicle tires.
- Seal Quality: Ensures a complete seal when paired with a patch kit (Slime).
| Feature | Description |
|---|---|
| Size | 1 oz |
| Applicator | Squeeze tube |
| Use Case | Small tire repairs |
| Application Ease | High |
For more comparisons between adhesives, you might find our articles on rubber cement vs. super glue or how long does rubber cement take to dry helpful.
Benefits of 8 oz Rubber Cement
The 8 oz rubber cement from Slime is designed for more extensive tire repair needs. It comes with features aimed at making the repair process efficient and mess-free.
- Size: 8 oz can
- Applicator: Comes with a no-mess brush applicator for precise application.
- Use Case: Suitable for larger or multiple repairs, including car and truck tires.
- Seal Quality: Provides a reliable, durable seal when used with Slime’s plug or patch kits (Slime).
| Feature | Description |
|---|---|
| Size | 8 oz |
| Applicator | Brush |
| Use Case | Large or multiple tire repairs |
| Application Ease | High (No-mess brush) |
Both the 1 oz and 8 oz options cater to different repair needs and preferences. For an in-depth guide on how to use these products, check out our section on the step-by-step guide for using Slime’s rubber cement.
If you’re looking to explore more about different gluing solutions, our comparison articles such as e6000 vs. gorilla glue and jb weld vs. gorilla glue provide valuable insights.
How to Use Rubber Cement
Slime’s rubber cement is a versatile product used to ensure a complete seal during tire repair. Here we provide a clear and knowledgeable guide on how to use slime rubber cement effectively.
Step-by-Step Guide
Follow these steps to use slime rubber cement for tire repair:
- Prepare the Tire: Identify the puncture and remove any foreign objects.
- Roughen the Surface: Use a rough tool to sand the area around the puncture to ensure better adhesion.
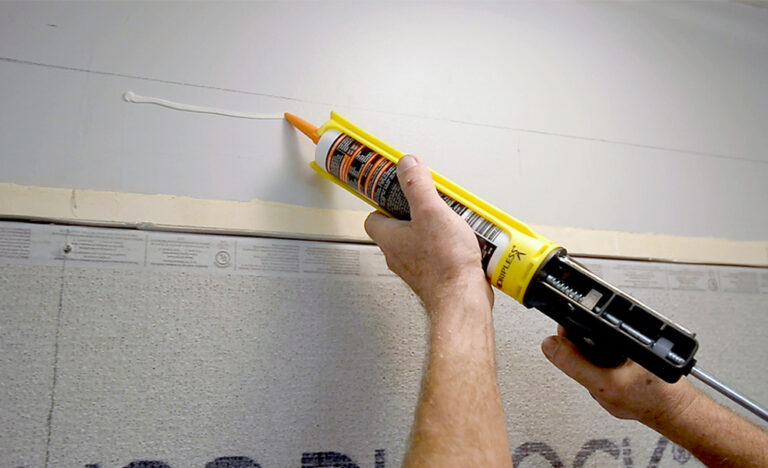
- Apply Rubber Cement: Squeeze a sufficient amount of slime rubber cement onto the roughened surface around the puncture.
- Insert the Tool: Apply rubber cement to a rasp tool and insert it into the puncture to clean and coat the hole.
- Prepare the Plug: Load the plug into the insertion tool. Wet the plug with rubber cement for lubrication.
- Insert the Plug: Carefully insert the plug into the puncture. Ensure it is properly seated.
- Trim the Plug: Cut the plug flush with the tire surface.
To refer back to the process, you can visit our detailed guide on how long does rubber cement take to dry.
Tips for Tire Repair
Here are practical tips to ensure successful tire repair using rubber cement:
- Inflate Partially First: After repairing, inflate the tire to about half the correct pressure. This allows you to check for any leaks. Perform a soapy water test to locate potential leaks (Quora).
- Check for Secure Seal: Before fully inflating the tire, ensure that the plug is securely inserted and the puncture is completely sealed.
- Safety Precautions: Always wear protective gloves and goggles while handling rubber cement and other repair tools.
To learn more about safety measures, you can revisit our section on safety precautions and how it relates to glue applications.
Visual Summary
| Step | Description |
|---|---|
| 1 | Identify and remove foreign objects from the puncture. |
| 2 | Roughen the puncture area for better adhesion. |
| 3 | Apply slime rubber cement generously around the puncture. |
| 4 | Apply cement to a rasp tool and insert it into the puncture. |
| 5 | Load and lubricate the plug with rubber cement. |
| 6 | Insert plug into puncture and cut flush with tire surface. |
| 7 | Inflate tire slightly and check for secure seal before full inflation. |
Utilizing these steps and tips ensures an effective repair process with slime rubber cement. For comparisons with other adhesives, explore our article on rubber cement vs. super glue to find the best fit for your repair needs.
Rubber Cement Application
Applying Slime Rubber Cement correctly is essential to ensure an effective tire repair. This section will illustrate how to squeeze and apply the product as well as how to partner it with a plug or patch kit.
Squeezing and Applying
Slime’s Rubber Cement can be used to ensure a complete seal on tire repairs. Here’s a simple step-by-step guide:
- Prepare the Surface: Clean the area around the puncture and roughen the surface with a rasp tool to ensure good adhesion.
- Squeeze and Apply Cement: Using the no-mess brush applicator from the 8 oz. can or the convenient squeeze bottle, apply a generous amount of rubber cement around the puncture hole. (Slime)
- Spread Evenly: Ensure the cement is spread evenly across the area to promote a better seal.
This application method helps to prepare the puncture area for the next steps, ensuring a secure seal.
Partnering with Plug or Patch Kit
For a thorough tire repair, it is advisable to use Slime Rubber Cement in combination with a plug or patch kit. Follow these steps:
- Remove Foreign Object: Remove any debris or the foreign object from the tire puncture.
- Apply Cement to Rasp: Apply rubber cement to the rasp tool and insert it into the puncture to clean and coat the inner hole.
- Load and Wet the Plug: Load the plug into the insertion tool and coat it with rubber cement. (Quora)
- Insert the Plug: Carefully insert the plug into the puncture, allowing the rubber cement to lubricate and secure the plug in place.
- Cut Excess: Trim the excess plug material flush with the tire surface.
This method adheres the plug securely, facilitating immediate inflation of the tire.
| Application Step | Description |
|---|---|
| Prepare the Surface | Clean and roughen the puncture area |
| Squeeze and Apply | Apply rubber cement generously |
| Spread Evenly | Ensure even coating for better adhesion |
| Use Plug Kit | Insert plug and apply cement |
| Trim Excess | Cut the plug flush with tire surface |
Using a rubber cement coupled with a plug or patch kit ensures comprehensive repair and provides a robust seal. For additional information on adhesive products and their applications, visit our comparison articles on rubber cement vs. super glue and epoxy vs. super glue.
For best practices and safety tips on using rubber cement, refer to our best practices for tire repair section or explore related glue comparisons like loctite pl marine vs. 5200.
Best Practices for Tire Repair
When repairing a tire using slime rubber cement, it’s essential to follow best practices to ensure a successful and secure repair. Here are some key considerations.
Safety Precautions
Before starting the tire repair process, adhere to the following safety precautions:
- Wear Protective Gear: Always wear gloves and safety glasses when handling rubber cement to protect your skin and eyes from potential irritation or injury.
- Ensure Proper Ventilation: Rubber cement fumes can be harmful if inhaled. Ensure you are working in a well-ventilated area to minimize exposure.
- Clean Work Area: Ensure the area around the puncture is clean and free from debris. This helps the rubber cement adhere properly.
- Remove Foreign Objects: Carefully remove any nails, glass, or other objects lodged in the tire.
Checking for Secure Seal
After applying the rubber cement and completing the plug or patch process, it is crucial to check for a secure seal to ensure the repair is successful and safe:
- Inflate the Tire Slightly: Inflate the tire to about half the recommended pressure. This allows for an initial check without fully pressurizing the tire (Quora).
- Inspect for Leaks: Apply soapy water around the repaired area. If bubbles form, there is a leak that needs to be addressed.
- Cut the Plug Flush: Once the cement is dry and you are satisfied there are no leaks, cut the plug flush with the tire surface. This ensures a smooth tire surface and prevents uneven wear.
- Inflate to Correct Pressure: Inflate the tire to the manufacturer’s recommended pressure after ensuring there are no leaks.
| Step | Action |
|---|---|
| 1 | Inflate tire to half the recommended pressure |
| 2 | Inspect for leaks using soapy water |
| 3 | Cut the plug flush with the tire surface |
| 4 | Inflate to the correct pressure |
For more information on different types of glue and their uses, consider reading about rubber cement vs. super glue or explore other relevant articles such as jb weld vs. gorilla glue. By following these best practices, you can confidently and safely repair your tires using slime rubber cement.
Quick-Dry Characteristics
One of the essential features of using Slime rubber cement for tire repair is its quick-dry characteristics. These attributes include a vulcanizing effect that ensures a strong bond and the ability to immediately inflate the tire after application.
Vulcanizing Effect
Rubber cement’s effectiveness can be attributed to its vulcanizing properties. Vulcanization is a chemical process that involves the cross-linking of rubber molecules when heat is applied, resulting in a more durable and elastic material. In the context of tire repair, the vulcanizing effect of Slime rubber cement helps create a secure bond between the tire and the plug or patch.
When rubber cement is applied to the plug or patch, it interacts with the rubber of the tire. As the cement dries, it forms a strong, flexible bond that withstands the stresses of tire inflation and road conditions. This process ensures a long-lasting repair, allowing the user to feel confident in their tire’s integrity.
Understanding the vulcanizing effect is crucial for effective tire repair and achieving the best results with rubber cement.
Immediate Inflation Process
Another key feature of Slime rubber cement is its ability to allow for immediate tire inflation following a repair. The quick-drying nature of the cement ensures that the plug or patch is secure shortly after application. This means that drivers do not have to wait for extended periods before inflating their tires.
The process of plugging tire punctures involves several steps:
- Remove the foreign object from the tire.
- Apply rubber cement to a rasp.
- Insert the rasp into the puncture to clean and prepare the hole.
- Load the plug into the insertion tool and wet it with rubber cement.
- Carefully insert the plug into the puncture.
- Cut the plug flush with the tire surface.
By following these steps, the plug is securely in place and the vulcanizing effect of the rubber cement takes hold. Because of this rapid setting time, the tire can be inflated right after the repair, ensuring that the driver can resume their journey without much downtime.
| Property | Description |
|---|---|
| Vulcanizing Effect | Creates a strong, flexible bond |
| Immediate Inflation | Allows for quick tire inflation post-repair |
For further guidance on how to effectively use rubber cement and other adhesives, explore our articles on how long does rubber cement take to dry and how to make e6000 glue dry faster.
The quick-dry characteristics of Slime rubber cement make it an invaluable tool for efficient and reliable tire repairs, providing both strength and convenience for users.

