How To Install Wall Panels Without Adhesive: Methods
Installing Wall Panels Without Adhesive
When considering how to install wall panels without adhesive, it’s crucial to understand the necessary preparation steps, the benefits of wall panels, and their maintenance and durability.
Preparation Steps Before Applying Adhesive
Even though this guide focuses on methods without adhesive, preparation steps remain similar to methods that involve glue. These steps are essential for any installation process:
- Arrange All Panels: Lay out the wall panels in the room where you plan to install them. Number each panel to ensure proper alignment, especially if there are cut openings for sockets or switches.
- Check Fit and Alignment: Ensure the panels fit properly on the wall surfaces, and all cut openings align well with the wall fixtures.
- Plan Your Fastening: Decide on the fastening methods and gather the necessary tools such as nails, screws, or clips. Ensure all tools and fixtures are suitable for the material and thickness of your panels.
For more details on alternatives to adhesive for other applications, you might find valuable insights in our article on what can I use instead of spray adhesive.
Benefits of Installing Wall Panels
Wall panels offer many advantages, making them a popular choice for interior decoration:
- Decorative Appeal: Wall panels come in various materials like solid wood, WPC, PVC, and MDF, providing a stylish and decorative look to any room.
- Protection and Insulation: They protect walls from damage and offer sound insulation, providing a quieter living environment.
- Ease of Installation: Installing wall panels is straightforward and less messy compared to painting (George Panel).
- Immediate Use: Rooms are ready for use immediately after panels are installed, avoiding drying times associated with paint.
These benefits are compelling reasons to choose wall panels over other methods for your home decor projects.
Maintenance and Durability of Wall Panels
Wall panels are known for their minimal upkeep and long-lasting nature:
- Durability: Wall panels are designed to last for years without warping or bending. However, they may be susceptible to cracking under excessive pressure.
- Ease of Cleaning: Cleaning wall panels is straightforward and typically involves wiping them with a damp cloth, making them ideal for areas where allergies to dust are a concern (George Panel).
- Low Maintenance: Due to their durable materials, wall panels require minimal maintenance, maintaining their appearance and functionality over time.
For more information on adhesives and related topics, consider reading our articles on what adhesive sticks to ceramic tile and how strong is hot glue.
By understanding the preparation steps, benefits, and maintenance of wall panels, you can make informed decisions about your next home improvement project, ensuring a stylish yet functional outcome.
Securing Items to Walls Without Adhesive
Installing wall panels without the use of adhesive can be a beneficial approach for those seeking an easy-to-disassemble and reusable option. In this section, we will cover various methods for secure attachment and help you choose the right fastening option.
Methods for Secure Attachment
There are multiple methods to fasten items securely to a wall without causing damage. These methods can be particularly useful for those who wish to avoid the permanence and potential wall damage associated with adhesive-based solutions. Below are some effective methods (Quora):
- Nails and Screws: Using nails or screws to secure wall panels is recommended for long-lasting results. Ensure the screws are appropriate for the wall type.
- Wall-Mounted Brackets: Brackets can provide strong support for heavier panels without the need for adhesives.
- Picture Hanging Strips: Ideal for lightweight panels, these strips provide a damage-free way to securely attach items to walls.
- Tension Rods: Useful in areas where drilling is not possible, tension rods can provide temporary support.
- Magnetic Strips: These can be useful for lightweight metal items and flexible mounting options.
Choosing the Right Fastening Option
Selecting the appropriate fastening method depends on the weight of the item to be secured and the type of wall surface. Consider the following table to help choose the best option for your needs:
| Fastening Method | Best For | Weight Limit | Wall Types |
|---|---|---|---|
| Nails and Screws | Long-term secure attachment | Up to 50 lbs | Drywall, wood, concrete |
| Wall-Mounted Brackets | Heavier items | Up to 100 lbs | Drywall, wood |
| Picture Hanging Strips | Light to medium items | Up to 20 lbs | Drywall, painted surfaces |
| Tension Rods | Temporary support | Variable | Tile, drywall |
| Magnetic Strips | Lightweight metal items | Up to 10 lbs | Drywall, stainless steel |
For detailed instructions on how to secure wood wall panels without adhesive, read our section on how to install wall panels with adhesive.
By carefully selecting and using the appropriate method, you can securely fasten wall panels without the need for adhesive. Understanding the strengths and limitations of each fastening option will ensure that your installation is both durable and damage-free. For further insights into adhesive alternatives, you might want to visit what can i use instead of spray adhesive.
Installing Wood Wall Panels
Pre-Installation Preparations
Proper preparation is crucial before installing wood wall panels without adhesive. Begin by ensuring that the underlying material is in good condition, as this will help achieve better affixation. This includes checking for damages, dampness, or inconsistencies. If necessary, sand away any rough areas to create a smooth, even surface.
Additionally, gather all necessary tools and materials for the installation process. Essential tools include:
- Circular saw with a fine-tooth blade
- Handsaw
- Drill and screws
- Measuring tape
- Sandpaper
Ensure that you have accurate measurements of the wall and panels to avoid wastage and errors during installation.
Securing Wood Panels Without Adhesive
To install wood wall panels without an adhesive, using screws is a reliable method. Follow these steps to ensure a secure attachment:
- Prepare the Wall: Start by sanding the wall surface to remove any inconsistencies. This step is crucial for a smooth finish.
- Drill Screw Holes: Drill the appropriate sized holes into the wooden battens. This will make it easier to screw the panels into place and ensure they remain securely attached (The Wood Veneer Hub).
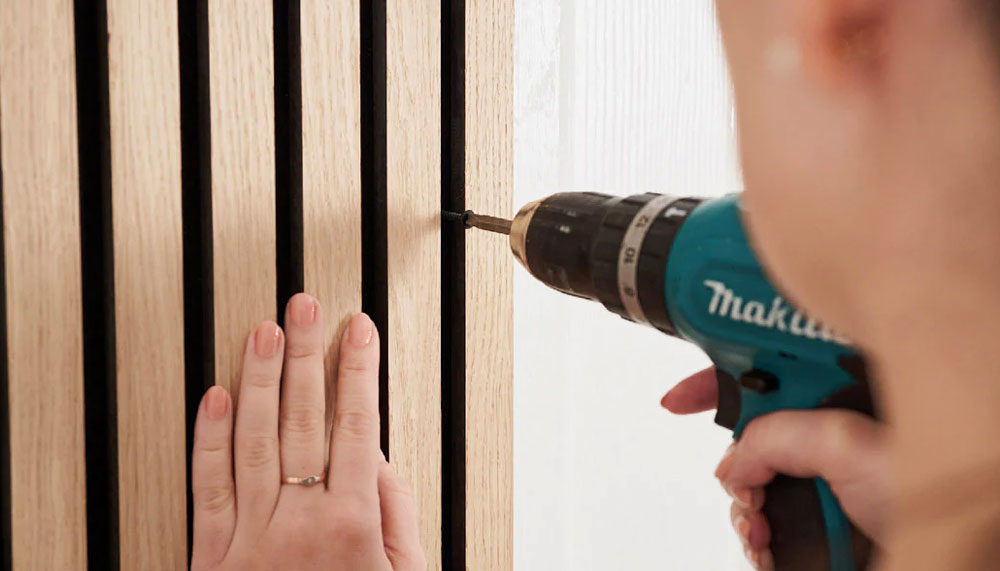
- Mount the Panels: Once the holes are drilled, position the wooden panels against the wall. Use a drill to insert screws through the pre-drilled holes into the battens and wall. Ensure each panel is level before proceeding to the next.
| Step | Description |
|---|---|
| 1 | Sand the wall surface |
| 2 | Drill screw holes into battens |
| 3 | Position and screw panels into place |
Considerations for plug outlets and fixtures may vary. Accurately measure and cut the panels to fit around fixtures such as windows, doors, and outlets to ensure precise fits.
For those interested in installing wall panels with adhesive, refer to our guide on how to install wall panels with adhesive for additional information. To explore alternatives to adhesive for other applications, check out our articles on what can I use instead of spray adhesive and can I use spray adhesive for wallpaper.
Installing PVC Wall Panels
When installing PVC wall panels, it’s crucial to select appropriate adhesives and follow the correct installation process. This ensures the panels stay securely attached and look great for years to come.
Suitable Adhesive Selection
For PVC wall panels, solvent-free adhesives are highly recommended. Solvent-based adhesives can react with the panel material, leading to potential issues. Below is a list of recommended adhesive options:
- The Pink Grip Solvent-Free: Suitable for various porous surfaces such as plasterboard, plastered walls, brick, block, and timber.
- Solvent-Free Adhesives: Ideal for use with PVC panels on ceramic tiles to prevent adverse reactions.
Recommended Adhesives Table
| Adhesive Name | Recommended Surfaces | Usage |
|---|---|---|
| Pink Grip Solvent-Free | Plasterboard, Plastered Walls, Brick, Timber | Use roughly half a tube per panel |
| Solvent-Free Adhesives | Ceramic Tiles | Prevents reactions between solvent and materials |
Installation Process and Recommendations
Proper installation of PVC wall panels involves several steps to ensure a smooth finish and long-lasting attachment.
- Preparation:
- Ensure the wall surface is clean and dry.
- Measure the wall and cut panels appropriately.
- Applying Adhesive:
- Use a solvent-free adhesive such as The Pink Grip.
- Apply adhesive in a zigzag pattern to the back of each panel.
- For detailed guidance, visit how to install wall panels with adhesive.
- Securing Panels:
- Press the panel firmly against the wall.
- Hold in place for a few minutes to allow the adhesive to bond.
- Finishing Touches:
- Ensure all panels are aligned correctly.
- Seal edges and corners with a silicone sealant for added durability.
This process ensures that PVC wall panels are properly secured, providing a durable and attractive finish. For more information on adhesives and their properties, you can explore articles like what adhesive sticks to ceramic tile and what can i use instead of spray adhesive.
By following these guidelines, you will effectively install PVC wall panels without adhesive-related issues, making your wall both functional and aesthetically pleasing.
Customer Reviews and Recommendations
When considering how to install wall panels without adhesive, hearing from those who have already tried various methods and techniques can provide invaluable insights. Below are some customer experiences and considerations.
Positive Customer Experiences
Many customers find wall panels, particularly those intended for adhesive-free installation, easy to use and highly effective. According to several buyers, these panels are easy to cut around wall plugs and light switches, making them versatile. They also report that the panels are excellent for covering flaws on drywall, giving surfaces a smooth and polished look.
| Aspect | Rating (out of 5) |
|---|---|
| Ease of Installation | 4.5 |
| Appearance | 4.0 |
| Versatility | 4.2 |
| Value for Money | 4.3 |
Additionally, customers appreciate the overall functionality, noting that the panels work great, look aesthetically pleasing, and are user-friendly (Amazon). The ease and convenience make these panels an attractive option for many.
Challenges and Considerations from Customers
Despite the positive feedback, there are a few challenges that customers have noted. Some consumers report that the product appears to be cheaply made and does not always provide good coverage relative to its price (Amazon). This has led to dissatisfaction with the overall quality for some users.
The stickiness of the product has also generated mixed reviews. While some customers find that the panels stick very well to surfaces, others experience difficulty in removal once applied, adding frustration to the process.
| Issue | Percentage of Negative Reviews |
|---|---|
| Material Quality | 20% |
| Stickiness | 15% |
| Coverage | 10% |
| Price vs Quality | 12% |
Overall, while installing wall panels without glue provides several advantages and positive experiences, it’s important to consider potential challenges. For more insights on adhesive options, check out what can I use instead of spray adhesive and how to use spray adhesive on fabric.
Tips and Tricks for Panel Installation
In this final section, we offer practical advice for successfully installing wall panels without adhesive. From the correct tools to cutting techniques and handling installations around fixtures, a well-executed installation can be achieved with these expert tips.
Tool Recommendations and Cutting Techniques
Proper tools and techniques make a world of difference in the outcomes of your wall panel installation. It’s important to select the right tools depending on the type of panels being installed.
Recommended Tools:
- Circular Saw: Ideal for cutting large and thick panels. Use a fine-tooth blade to achieve clean edges. (26estore)
- Handsaw: Effective for making precise cuts. Always measure twice and cut once for the best results.
- Level: Ensures your panels are straight and even on the wall.
- Tape Measure: Essential for getting accurate measurements.
- Jigsaw: Use when intricate cuts are required, especially around fixtures or curves.
| Tool | Best For |
|---|---|
| Circular Saw | Large, thick panels and straight cuts |
| Handsaw | Precision cuts in smaller areas |
| Level | Ensuring straight alignment of panels |
| Tape Measure | Accurate measurements for cutting and placement |
| Jigsaw | Intricate cuts around fixtures and curved edges |
- Cutting Techniques: When cutting wall panels to fit around fixtures, ensure symmetrical cuts to maintain an even and professional look. This is particularly important when using tools like a circular saw due to its easy handling. The cutting process generally takes between two to five hours (27estore).
Handling Panel Installation Around Fixtures
Installing panels around fixtures such as plugs, outlets, windows, and doors requires careful planning and execution.
-
Plug Outlets and Fixtures: Different steps are involved when dealing with plug outlets and fixtures as opposed to windows and doors.
-
Outlets and Switches: Turn off the power and remove the cover plates. Measure the location and dimensions of the outlets and mark these on the panel. Use a jigsaw for precise cutouts.
-
Windows and Doors: Take accurate measurements of the window and door frames. Use a circular saw with a fine-tooth blade for straight cuts, ensuring the panels fit snugly around the frames (Bark & Bole).
-
Symmetry and Alignment: It’s crucial to ensure symmetrical cuts and alignments, particularly around fixtures. Misalignment can lead to visible gaps and an unprofessional finish.
For more comprehensive guides and recommendations for adhesive and non-adhesive installation methods, explore our detailed articles on how to install wall panels with adhesive and alternative adhesives.
Adhering to these tips and tricks ensures a smooth, clean, and professional installation process, keeping your wall panels both functional and aesthetically pleasing.

