Arrow Insert Glue vs. Super Glue for Archery Success
When it comes to archery, every component of your setup affects your performance and consistency. One often-overlooked element is the adhesive used to secure arrow inserts and nocks. In the archery community, a frequent debate centers around two options: specialized arrow insert glue and super glue. This article will dive deep into the differences, advantages, disadvantages, and best practices for each type of adhesive to help you maximize your archery success.
Understanding Arrow Insert Glue
Arrow insert glue is specially designed for securing arrow inserts, nocks, and other components. It offers a tailored solution to the stresses arrows experience upon release and impact. There are two main types of arrow insert glue: hot melt adhesives and epoxy adhesives.
1. Hot Melt Adhesives
Hot melt adhesives are a popular choice among archers because of their adjustability. These glues are applied in a heated, molten state and harden as they cool.
- Pros:
- Easy to apply and reposition components.
- Components can be removed or adjusted by reheating.
- Ideal for quick fixes or adjustments during competitions or hunting trips.
- Cons:
- Excessive heat can damage carbon arrow shafts, requiring low-temperature hot melts.
- Hot melts may not provide the strongest bond for high-impact situations, particularly with heavier arrows or broadheads.
Hot melts work particularly well with aluminum arrows but must be handled carefully when used with carbon shafts.
2. Epoxy Adhesives
Epoxy adhesives are two-part mixtures that cure over time to form a robust, impact-resistant bond. They are widely regarded as one of the most durable options for securing inserts.
- Pros:
- High impact resistance, making them suitable for hunting and competitive shooting.
- Provides a permanent bond that is less likely to fail under stress.
- Stronger and more reliable than hot melt adhesives in high-impact scenarios.
- Cons:
- Longer curing time, sometimes requiring up to 24 hours to fully harden.
- Difficult to adjust once the adhesive has set.
- Removal of inserts requires either destructive methods or specialized solvents.
Epoxy adhesives are a favorite for archers who prioritize long-term durability over adjustability.
Understanding Super Glue (Cyanoacrylate Adhesive)
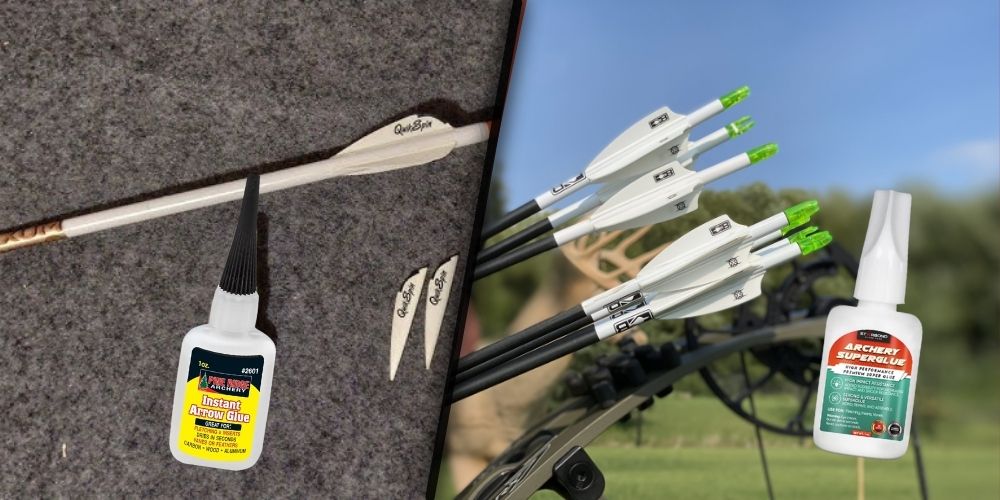
Super glue, or cyanoacrylate adhesive, is known for its rapid setting time and availability. While not specifically designed for archery, some archers use it due to its convenience. However, there are several important factors to consider before relying on super glue for your arrow inserts.
Advantages of Super Glue
- Fast Curing:
Super glue bonds almost instantly, which is beneficial if you need to quickly replace inserts or make repairs. - Easy Application:
Applying super glue is straightforward, with no need for mixing or heating. - Readily Available:
Super glue can be found in most hardware stores and is relatively inexpensive.
Disadvantages of Super Glue
- Brittleness:
Standard super glue tends to become brittle after curing. This brittleness can cause the bond to crack or fail under the repeated shocks and vibrations arrows experience when fired. - Lack of Flexibility:
Arrows undergo flexing during flight and impact. Super glue’s rigid bond may not accommodate this flexing, potentially leading to insert failure over time. - Difficult Removal:
Once super glue cures, it is extremely challenging to remove inserts without damaging the shaft.
However, there are impact-resistant variants of super glue, such as Gorilla Glue Impact-Tough or Loctite Ultra Control Gel, which offer improved flexibility and shock absorption.
Comparing Arrow Insert Glue and Super Glue
| Feature | Arrow Insert Glue | Super Glue |
|---|---|---|
| Bond Strength | Strong and impact-resistant | Strong but brittle under stress |
| Adjustability | High (hot melts can be reheated) | Low (sets quickly and is permanent) |
| Curing Time | Moderate to long (up to 24 hours for epoxies) | Very fast (seconds to minutes) |
| Compatibility | Designed for archery materials | General-purpose; may not handle arrow stresses |
| Flexibility | Allows for shaft flexing and vibration | Limited flexibility; may crack under stress |
| Removal/Adjustment | Easy with hot melt; difficult with epoxy | Difficult without damaging components |
| Application Convenience | Moderate (hot melts and mixing for epoxies) | High (ready to use, no preparation required) |
Best Practices for Applying Adhesives
Whether you choose arrow insert glue or super glue, proper preparation and application techniques can significantly affect your results. Here are some tips to ensure a strong, reliable bond:
1. Surface Preparation
Before applying any adhesive, clean the inside of the arrow shaft and the insert. Dirt, oil, and debris can weaken the bond. Use isopropyl alcohol and a cotton swab to thoroughly clean both surfaces.
2. Application Technique
Apply the adhesive evenly to both the insert and the shaft. For hot melt adhesives, heat the insert and apply the adhesive before inserting it into the shaft. For epoxies and super glue, ensure complete coverage without excessive adhesive, as excess glue can interfere with proper alignment.
3. Curing Time
Allow the adhesive to fully cure before using your arrows. Epoxy adhesives may require up to 24 hours, while super glues typically cure in minutes. Avoid rushing the curing process, as this can compromise the bond’s strength.
4. Heat Management (for Hot Melt Glues)
When using hot melt adhesives with carbon arrows, use a low-temperature glue gun or heat source to avoid damaging the shaft. Excessive heat can weaken carbon fibers and compromise the arrow’s integrity.
Choosing the Right Adhesive for Your Needs
The best adhesive for your arrows depends on your priorities and shooting style:
- Hot Melt Adhesive: Ideal for archers who want flexibility and the ability to adjust or remove inserts. This option is popular among target archers who frequently change components.
- Epoxy Adhesive: Best for archers who prioritize durability and impact resistance. Hunters and competitive shooters who use high-impact arrows will benefit from the strong, permanent bond provided by epoxy.
- Super Glue: Suitable for quick fixes and temporary repairs. While not ideal for long-term use, impact-resistant variants can offer a balance between convenience and performance.
Common Mistakes to Avoid
- Using Too Much Adhesive:
Excess adhesive can seep into unwanted areas, affecting arrow balance and flight. - Skipping Surface Preparation:
Failure to clean surfaces can lead to weak bonds and early adhesive failure. - Applying Excessive Heat to Carbon Arrows:
Carbon shafts are sensitive to heat, so use caution when applying hot melt adhesives. - Ignoring Curing Times:
Rushing to use arrows before the adhesive has fully cured can compromise bond strength and safety.
Conclusion
Selecting the right adhesive for securing arrow inserts is a crucial aspect of archery success. Specialized arrow insert glues, including hot melts and epoxies, are designed to withstand the dynamic forces involved in shooting and impact. While super glue offers convenience and rapid curing, it may not provide the flexibility and durability needed for long-term performance.
By understanding the strengths and limitations of each adhesive type, you can make informed choices that enhance your archery experience and ensure consistent, reliable results on the range or in the field.
