How to Open Tacky Glue: Quick Solutions
Opening Tacky Glue
Discovering how to open tacky glue can be a challenge, especially when the cap is firmly sealed. Here are some methods to help you access your adhesive without causing damage.
Methods for Opening
Several techniques can be employed to open a tacky glue bottle. Each method has its own advantages and may be more suited to different situations.
-
Immersing in Hot Water: Placing the glue bottle in hot (but not boiling) water helps soften any dried glue that may be causing the cap to stick. This method is gentle on the cap and minimizes the risk of cracks. For best results, submerge the glued-shut cap in a cup of hot water for a few minutes (Quora).
-
Using Adjustable Pliers: A pair of adjustable pliers can provide extra grip and leverage to twist off a stubborn cap. To avoid damaging the cap, use a cloth as a buffer between the cap and pliers (Rocketry Forum).
-
Running Under Warm Water: Similar to the hot water immersion method, running the cap under a warm water tap can help soften the glue. This technique is effective for quickly loosening the cap without requiring too much preparation.
-
Twist and Tap: Another simple method is to gently tap the glue bottle on a hard surface while twisting the cap. This can help dislodge any dried glue inside the nozzle.
Using Adjustable Pliers
When gentle methods don’t work, adjustable pliers can be employed to open tacky glue bottles. Here’s how to safely use them:
-
Prepare the Pliers: Adjust the pliers to fit snugly around the cap of the glue bottle. Use a cloth to wrap around the cap for added protection against scratches and cracking.
-
Grip the Cap: Position the pliers around the covered cap, ensuring a firm grip. Avoid applying excessive pressure which could damage the cap.
-
Twist to Open: Steadily twist the pliers counterclockwise to loosen the cap. If the cap doesn’t budge, try running the cap under warm water for a few more minutes and then retry.
| Method | Equipment Needed | Risk of Cap Damage |
|---|---|---|
| Hot Water Immersion | Cup of hot water | Low |
| Adjustable Pliers | Adjustable pliers, cloth | Medium |
| Warm Water Tap | Warm running water | Low |
| Twist and Tap | Hard surface | Low |
Each of these methods provides a practical approach to ensuring your tacky glue bottle opens without excessive hassle. For related tips, check out our guides on how to use goo gone or how to make super glue.
Strategies for Opening Glue Bottles
Immersing in Hot Water
When faced with a stubborn glue bottle cap, immersing the bottle in near-boiling water can be an effective solution. The heat softens the dried glue and loosens the cap, making it easier to open without damaging it. This method reduces the need for tools like pliers, which can sometimes crack the cap. To use this technique:
- Boil water and let it cool slightly.
- Immerse the bottle in the hot water for a few minutes.
- Attempt to twist the cap open once the glue has softened.
For more methods on opening glue bottles, see how to open tacky glue.
Preventing Cap Damage
Preventing damage to the glue bottle cap is essential to maintain the integrity of the bottle for future use. One effective strategy is to immerse the bottle in hot water, as mentioned above. This method allows you to avoid using forceful tools that may crack or damage the cap. Follow these steps to ensure cap safety:
- Immerse the bottle in near-boiling water for a few minutes.
- Use a cloth or rubber grip to twist the cap open gently.
Remember to store glue bottles in a cool, dry place to prevent the glue from drying out and causing cap issues. For additional tips on storing glue, refer to our article on storing glue properly.
By employing these strategies, you can effectively open tacky glue bottles while preserving the bottle cap for future use. For more information on dealing with glue, explore our articles on how to make super glue and how to remove mirror adhesive.
Dealing with Dried Glue
When using tacky glue, it’s common to encounter issues with dried glue, which can make opening the bottle challenging. Here we delve into the tools and techniques for dealing with such problems.
Tools for Removing Cap
Removing a glued-on cap requires the right tools. Several items can be used to safely pry off the cap without causing damage:
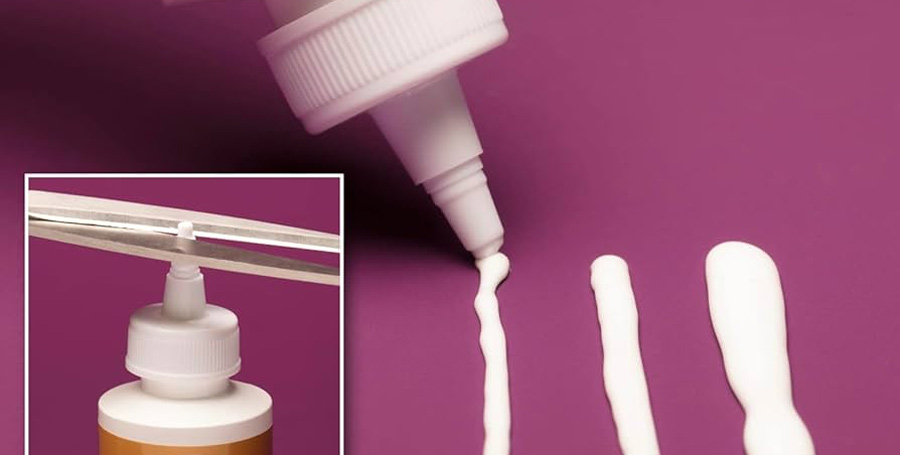
- Prying Tool: A pair of partially open scissors can act as an effective prying tool. Carefully wedge the scissor tips under the cap to lift it off (Quora).
- Adjustable Pliers: Adjustable pliers provide a strong grip and leverage to twist off stubborn caps.
- Toothpick: For removing dried glue from the tip, a toothpick can be very useful.
| Tool | Use Case |
|---|---|
| Partially Open Scissors | Prying the cap off |
| Adjustable Pliers | Twisting off stubborn caps |
| Toothpick | Removing dried glue from the tip |
Using the right tools helps prevent damage to the cap and ensures you can open the bottle effectively.
Softening Dried Glue
Softening dried glue can make it easier to remove the cap and clean the nozzle. Here are some methods to soften the glue:
- Hot Water: Immerse the glue bottle cap in very hot water to soften the glue. This will make it easier to remove the cap and clean the nozzle (Quora).
- Microwave: Place the glue bottle (without the cap) in the microwave for a few seconds to soften the glue.
- Steam: Hold the glue bottle near steam from boiling water to loosen the glue inside.
For additional methods on dealing with glue and adhesive-related issues, read our articles on how to use Alien Tape and how to get adhesive off surfaces.
By utilizing these methods and tools, dealing with dried glue becomes manageable, ensuring that your tacky glue remains usable and effective for your projects.
Troubleshooting Common Issues
Tips for Preventing Clogs
Preventing clogs in glue bottles can save time and frustration. Here are a few strategies to help keep your glue flowing freely:
- Clean the Nozzle: After each use, ensure that the nozzle is clean. Wipe off any excess glue with a damp cloth or paper towel.
- Cap It Tight: Make sure the cap is tightly secured after each use. This helps prevent air from entering the bottle, which can cause the glue to dry and clog the nozzle.
- Store Upright: Store the glue bottle upright to avoid glue settling into the nozzle.
- Regular Maintenance: Periodically open the bottle and check for dried glue inside the nozzle. If found, use a toothpick or pin to clear it out.
To learn more about maintaining adhesives, visit our how to get adhesive guide.
Storing Glue Properly
Proper storage is essential for prolonging the life of your tacky glue and avoiding common issues like clogs and drying out.
- Cool, Dry Place: Store glue in a cool, dry place away from direct sunlight and heat sources. Excessive heat can cause the glue to thicken or dry out.
- Sealed Container: Ensure the glue bottle is always tightly sealed when not in use. For added protection, consider placing the bottle in a resealable plastic bag.
- Consistent Temperature: Avoid exposing the glue bottle to extreme temperature fluctuations, which can affect the glue’s consistency and effectiveness.
- Label and Date: If you have multiple bottles, label them with the purchase date to keep track of their shelf life.
For more tips on handling different types of adhesives, refer to our advantages and disadvantages section.
By following these tips for preventing clogs and storing glue properly, you can ensure that your tacky glue remains usable and effective whenever you need it. For other related information, visit how to use goo gone or duct tape vs. packing tape.
