Liquid Nails vs. Gorilla Glue: Which One to Choose?
Comparing Gorilla Glue and Liquid Nails
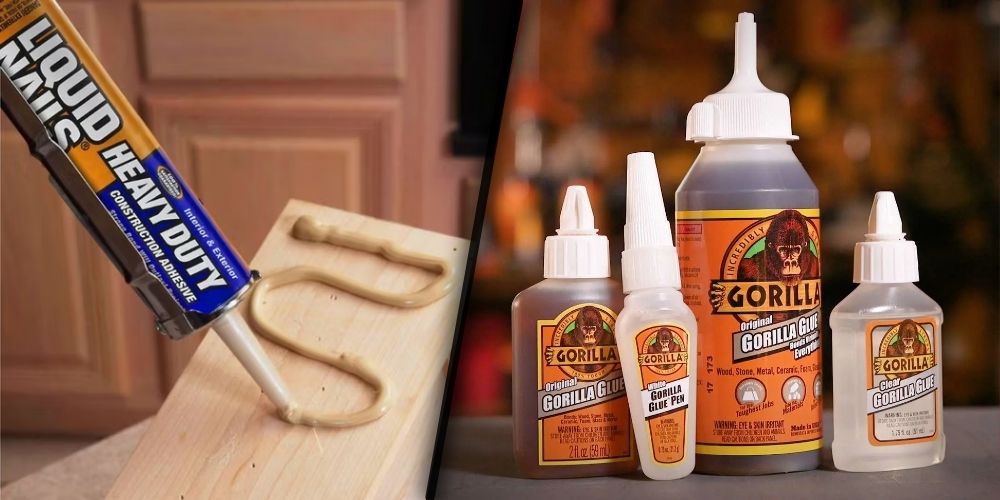
When deciding between Liquid Nails vs. Gorilla Glue, understanding the properties and functionalities of each adhesive is crucial. Both adhesives are popular in the construction and DIY communities, but they serve different purposes and offer unique benefits.
Understanding Gorilla Glue
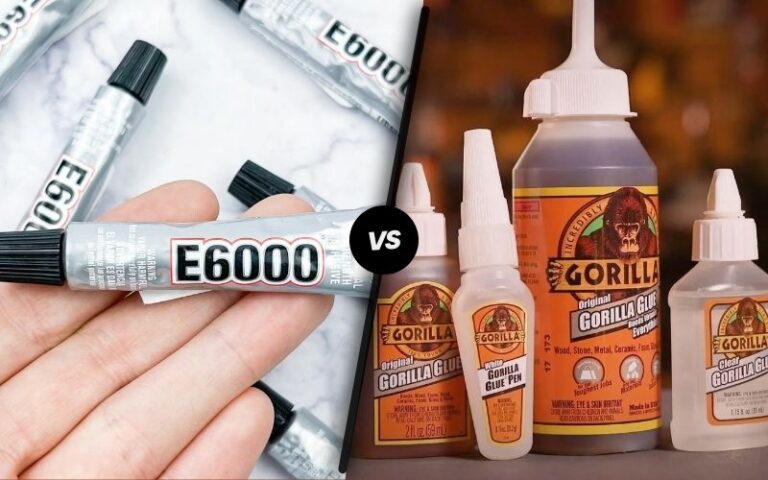
Gorilla Glue is a moisture-activated polyurethane adhesive that forms a strong bond with a wide range of materials (Gorilla Tough).
Key Features of Gorilla Glue:
- Moisture Activation: Requires a small amount of moisture to be applied to one or both surfaces before use.
- Versatility: Bonds with wood, metal, stone, foam, glass, ceramic, and more.
- Expansion: Expands 3-4 times its initial size to fill gaps and create a tight bond.
Application Tips for Gorilla Glue:
- Surface Preparation: Ensure surfaces are clean, dust-free, and slightly dampened.
- Light Application: Use a small amount of glue, as the expansion fills gaps.
- Clamping: Secure the pieces together for 1-2 hours to ensure a strong bond.
Understanding Liquid Nails
Liquid Nails is a construction adhesive designed for heavy-duty use, offering excellent bonding strength for multiple surfaces, including concrete, wood, and metal (USVintageWood).
Key Features of Liquid Nails:
- Heavy-Duty: Suitable for construction projects and large-scale applications.
- Surface Compatibility: Bonds with concrete, metal, wood, and other materials.
- Bonding Properties: Creates an exceptionally strong bond when applied correctly.
Drying Time Considerations for Liquid Nails:
| Adhesive Type | Bonding Time | Complete Cure Time |
|---|---|---|
| Liquid Nails Heavy Duty | 15 minutes | 24 hours |
| Liquid Nails Extreme | 10 minutes | 24-48 hours |
| Liquid Nails Fuze*It All Surface | 30 minutes | 24 hours |
For more details on other adhesives, refer to our comparison articles like flex glue vs. gorilla glue and hot glue vs. gorilla glue.
By understanding these properties, individuals can make informed decisions on whether Gorilla Glue or Liquid Nails is the best choice for their specific needs. From versatile Gorilla Glue with its moisture activation to the heavy-duty performance of Liquid Nails, both adhesives offer unique solutions for various applications.
Application and Drying Times
Understanding the application and drying times of Gorilla Glue and Liquid Nails is crucial for achieving optimal results in your projects. Here’s a closer look at how to apply each adhesive and what to expect during the drying process.
Gorilla Glue Application Tips
Gorilla Glue is a moisture-activated polyurethane adhesive that requires a small amount of moisture to be applied to one surface (Gorilla Tough). For dense hardwoods, it is recommended to lightly dampen both surfaces before applying the glue.
Application Steps:
- Moisturize: Dampen one surface with a small amount of water. For dense hardwoods, moisten both surfaces.
- Apply Gorilla Glue: Apply the glue evenly on the other surface.
- Clamp the Pieces Together: Ensure the materials are tightly clamped (preferably 1-2 hours) as Gorilla Glue expands as it cures.
| Feature | Gorilla Glue |
|---|---|
| Minimum Application Temperature | Above 40°F |
| Optimal Application Temperature | Room Temperature |
| Service Temperature Range | -40°F to 200°F |
For more information on adhesive applications, see our comparison on flex glue vs. gorilla glue.
Liquid Nails Drying Time Considerations
Liquid Nails has a significantly longer drying time compared to Gorilla Glue. The general drying time is at least 24 hours, but some projects may take weeks to fully cure (USVintageWood).
Application Steps:
- Prepare the Surface: Clean and dry surfaces to be bonded.
- Apply Liquid Nails: Using a caulk gun, apply Liquid Nails in a zigzag pattern or beads on one surface.
- Press and Secure: Press the materials together and secure them in place.
Drying Tips:
- Avoid moving the bonded surfaces during the initial 24-hour drying period.
- Optimal drying conditions involve room temperature and low humidity.
| Feature | Liquid Nails |
|---|---|
| Minimum Drying Time | 24 hours |
| Complete Cure Time | Several days to weeks |
| Considerations | Room temperature, low humidity |
For more on adhesives used in different contexts, check out our comparison of wood glue vs. super glue.
Choosing between Liquid Nails and Gorilla Glue depends on your specific project requirements, including application methods, drying times, and the materials you are working with. For further insights into adhesive solutions, you might consider our articles on krazy glue vs. gorilla glue and hot glue vs. gorilla glue.
Surfaces and Bonding Strength
Gorilla Glue Surface Versatility
Gorilla Glue is known for its remarkable versatility, making it suitable for a variety of surfaces. This moisture-activated polyurethane adhesive requires a small amount of moisture on one surface before applying the glue to the dry surface. For dense hardwoods, lightly dampening both surfaces before gluing is recommended (Gorilla Tough).
| Surface Type | Compatibility |
|---|---|
| Wood | Excellent |
| Stone | Excellent |
| Metal | Excellent |
| Plastic (most types) | Good |
| Polypropylene (PP) /Polyethylene (PE) | Not Recommended |
| Rubber with high oil content | Not Recommended |
Gorilla Glue’s flexible and waterproof nature makes it a popular choice among woodworkers and in construction projects. However, it is not recommended for use on polypropylene or polyethylene plastics or any type of rubber with high oil or plasticizer content. For more information on application tips, see our section on Gorilla Glue Application Tips.
Liquid Nails Bonding Properties
Liquid Nails is a robust adhesive favored for its strong bonding properties and its suitability for heavy-duty construction work. Unlike traditional wood glue, Liquid Nails can be used on multiple surfaces, including concrete, making it an excellent choice for extensive construction projects.
| Surface Type | Compatibility |
|---|---|
| Wood | Excellent |
| Concrete | Excellent |
| Metal | Good |
| Plastic | Good |
| Drywall | Excellent |
| Tile | Good |
Liquid Nails offers stronger bonding compared to wood glue, as long as the application instructions, especially the drying time, are properly followed (USVintageWood). For more information on drying time considerations, see our detailed section on Liquid Nails Drying Time Considerations.
By understanding the surface versatility and bonding properties of both Gorilla Glue and Liquid Nails, you can make a more informed decision based on your specific project needs. For further guidance, explore our resources on polyurethane glues overview and specialty glues in construction.
Removal and Clean-Up
When comparing Gorilla Glue and Liquid Nails, it’s important to understand the removal and clean-up processes for both adhesives. This knowledge can help in deciding which product best suits your project needs.
Cleaning Gorilla Glue
Gorilla Glue is known for its strong bonding properties, but it can be a bit challenging to clean up if not handled properly. Here are the recommended procedures:
- Uncured Glue:
- Remove uncured “squeeze-out” or wet glue by wiping with a dry cloth or using a standard paint thinner. (Gorilla Tough)
- Ensure the surface is thoroughly cleaned to prevent any residue from curing and becoming difficult to remove.
- Cured Glue:
- Once Gorilla Glue has dried, it can be best removed by mechanical means such as sanding, chiseling, scraping, or picking. These methods might prevent damage to your tools as well. (Gorilla Tough)
- Skin Contact:
- For wet glue: Use a dry cloth or paper towel to first wipe off the glue. Wash the area with gritty soap and warm water, then dry thoroughly and apply lotion. Avoid using alcohol or acetone on the skin. (Gorilla Tough)
- For cured glue: The glue may cause temporary staining, and it might take several days to wear off completely. Keep the affected area moisturized during this period.
| Gorilla Glue Cleaning Methods | Uncured Glue | Cured Glue |
|---|---|---|
| Surface Removal | Dry cloth, paint thinner | Sanding, chiseling, scraping |
| Skin Contact Removal | Dry cloth, gritty soap, lotion | Moisturizers for staining |
Removing Liquid Nails
Liquid Nails is widely used for various construction and DIY projects but has its own specific removal process.
- Uncured Adhesive:
- Utilize mineral spirits to remove the adhesive while it’s still wet. Wipe the area with a clean, dry cloth to get rid of any residual adhesive.
- Ensure you work in a well-ventilated area when using mineral spirits to avoid inhaling fumes.
- Cured Adhesive:
- Use mechanical means such as prying, scraping, or chiseling to remove the cured adhesive. Similar to Gorilla Glue, careful mechanical removal helps avoid damage to underlying surfaces and tools.
- Skin Contact:
- For uncured adhesive: Wash the area with soap and water immediately to prevent the glue from setting on the skin.
- For cured adhesive: Use an exfoliating soap or scrub combined with warm water to gradually remove the adhesive.
| Liquid Nails Cleaning Methods | Uncured Adhesive | Cured Adhesive |
|---|---|---|
| Surface Removal | Mineral spirits, dry cloth | Prying, scraping, chiseling |
| Skin Contact Removal | Soap and water | Exfoliating soap, scrub, warm water |
Choosing between Gorilla Glue and Liquid Nails involves understanding the unique removal methods for each adhesive. For more information on specialty glues, visit our articles on flex glue vs. gorilla glue and hot glue vs. gorilla glue.
Safety Considerations
When deciding between Liquid Nails and Gorilla Glue, it’s vital to understand the safety implications of each product. This section focuses on the key safety measures for Gorilla Glue and the flammability and toxicity concerns related to Liquid Nails.
Gorilla Glue Safety Measures
Gorilla Glue is renowned for its strong bonding capabilities, but it requires careful handling to ensure safety. The manufacturer does not recommend using alcohol or acetone to remove the glue from the skin. Cured glue on fingers may cause temporary staining and can take several days to wear off (Gorilla Tough).
Gorilla Glue emits fumes that can be harmful if inhaled in large quantities. Therefore, it’s crucial to work in a well-ventilated area. Protective gloves are advised to prevent skin contact.
Safety Tips:
- Always work in a well-ventilated space.
- Wear gloves to prevent skin contact.
- Avoid direct inhalation of fumes.
Liquid Nails Flammability and Toxicity
Liquid Nails is a powerful adhesive widely used in construction, but it contains solvent-based ingredients that emit toxic fumes when wet. These fumes can be particularly dangerous in poorly ventilated spaces (USVintageWood). Unlike wood glue, which is generally safer, Liquid Nails can also be flammable until completely dry.
The Fuze-It product from Liquid Nails combines strength with resistance to cold and moisture, making it versatile for various household projects. However, users should always take preventive measures to avoid exposure to toxic fumes and reduce risk of fire (Family Handyman).
Safety Tips:
- Ensure adequate ventilation when using Liquid Nails.
- Avoid open flames or sparks until the adhesive is completely dry.
- Use protective equipment such as gloves and masks.
| Product | Safety Concerns | Recommendations |
|---|---|---|
| Gorilla Glue | Emits harmful fumes, can stain skin | Use in ventilated space, wear gloves |
| Liquid Nails | Emits toxic fumes, flammable until dry | Ensure good ventilation, avoid open flames |
For more information on adhesives, including comparisons like leak lock vs. Loctite and Loctite 221 vs. 222, please check our other articles.
Specialty Glues in Construction
In the world of construction, choosing the right adhesive can make a significant difference. Among the various options, some specialty glues have unique properties making them suitable for specific applications. Here, we’ll delve into polyurethane glues and rubber cement.
Polyurethane Glues Overview
Polyurethane glues, such as Gorilla Glue, have gained a solid reputation for their versatility and strength. Highly water-resistant and suitable for outdoor projects, polyurethane glues can substitute for PVA adhesives and require clamping for strong joints. Once cured, they are resilient to wet conditions and can even be painted over (Cottage Life).
| Property | Description |
|---|---|
| Water Resistance | High |
| Bonding Surfaces | Wood, stone, metal, plastic |
| Flexibility | Good |
| Clamping Required | Yes |
| Notable Brands | Gorilla Glue, Titebond |
Polyurethane glue addresses the expansion issue by offering non-foaming formulations. These glues are especially popular in woodworking and construction due to their ability to create strong, durable joints. For more insights into different applications, explore our article on Gorilla Glue vs. Super Glue.
Rubber Cement Applications
Rubber cement, known for its flexibility and temporary bonding capability, offers a range of uses in construction and arts and crafts. It is primarily used for projects where materials might need to be repositioned.
| Property | Description |
|---|---|
| Water Resistance | Low |
| Bonding Surfaces | Paper, cardboard, fabric |
| Flexibility | High |
| Clamping Required | No |
| Notable Brands | Elmer’s, Faber-Castell |
Rubber cement is valued for its ease of application, allowing for a clean and mess-free adhesion. It’s ideal for delicate materials and can be cleaned up easily if a mistake is made. However, due to its lower water resistance, it is less suitable for heavy-duty outdoor projects.
By understanding the unique properties and suitable applications of these specialty glues, one can select the right adhesive for their specific needs. Both polyurethane glues and rubber cement offer valuable benefits, each catered to different types of projects. For a comprehensive comparison of adhesives, visit our articles on clear glue vs. white glue and epoxy vs. super glue.
